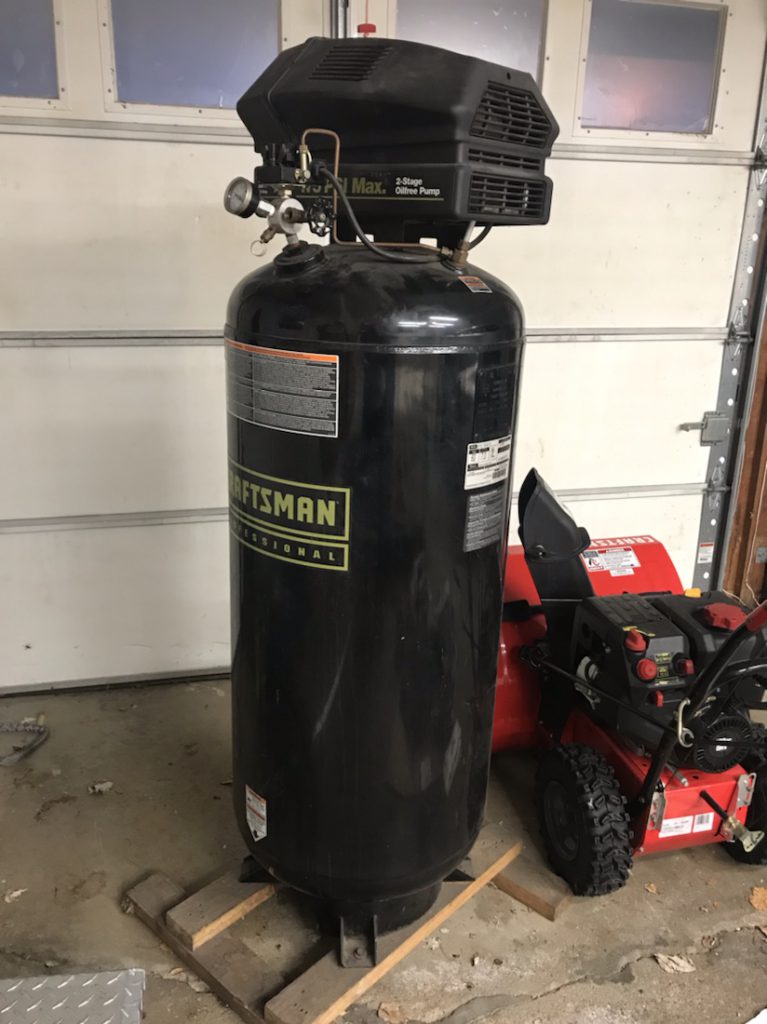
A good friend of mine, Andy, had this 60 gallon/175 psi air compressor for about 10 years when he bought it used. 5 years ago, he rebuilt the pump because it wasn’t delivering air at the expected rate. Its seen some heavy use and is running a bit tired again, so he ended up buying a new one and asked me if I would want to have the old one as a project.
Of course! I enjoy working on things like this. So later today, I plan on running some tests and calculate the pumps SCFM to see just how far it is off at its rated capacity.
I had just finished rebuilding this much older 30 gallon / 125 psi compressor. It still has a very small air leak, that I can hear, I just haven’t found it yet.
I have a few thoughts on what I might do with these. I have considered just piping the two tanks together and run them off the smaller, working, pump. That would give me 90 gallons of air at 125 psi. I do, however, worry about how much the old pump can really keep up and if that would put too much of a strain on the motor.
Once I figure out just how bad the old pump is, and what it will take to fix it, I’ll know what my options could be. Maybe I’ll just turn it into a 60 gallon smoker!
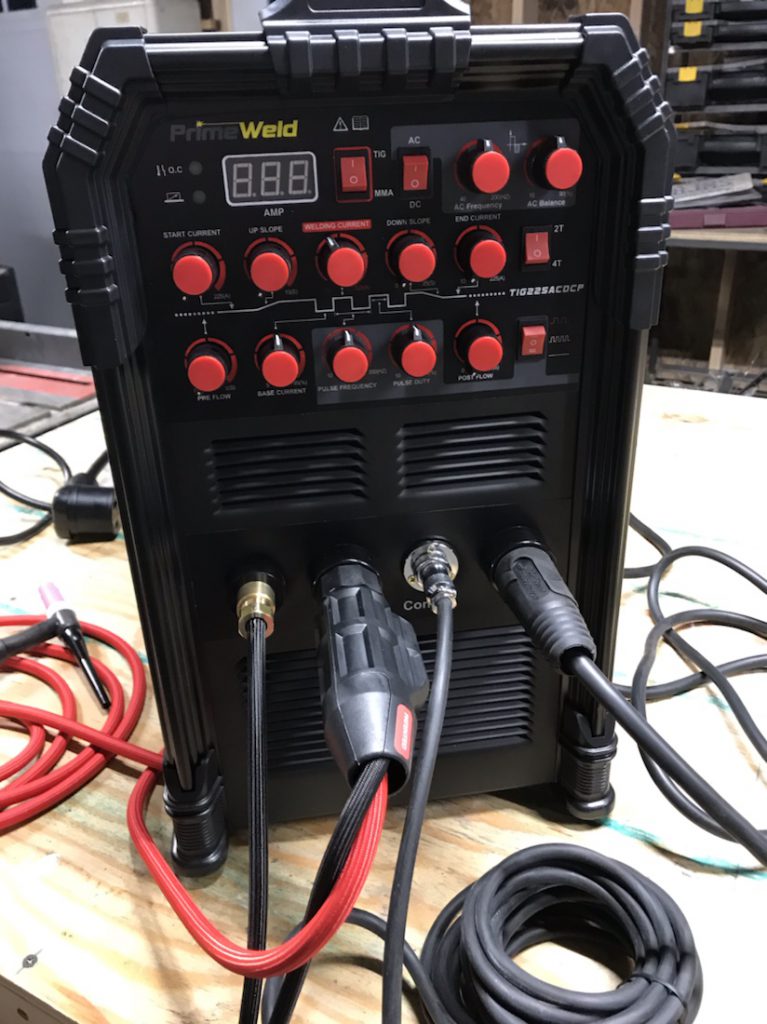
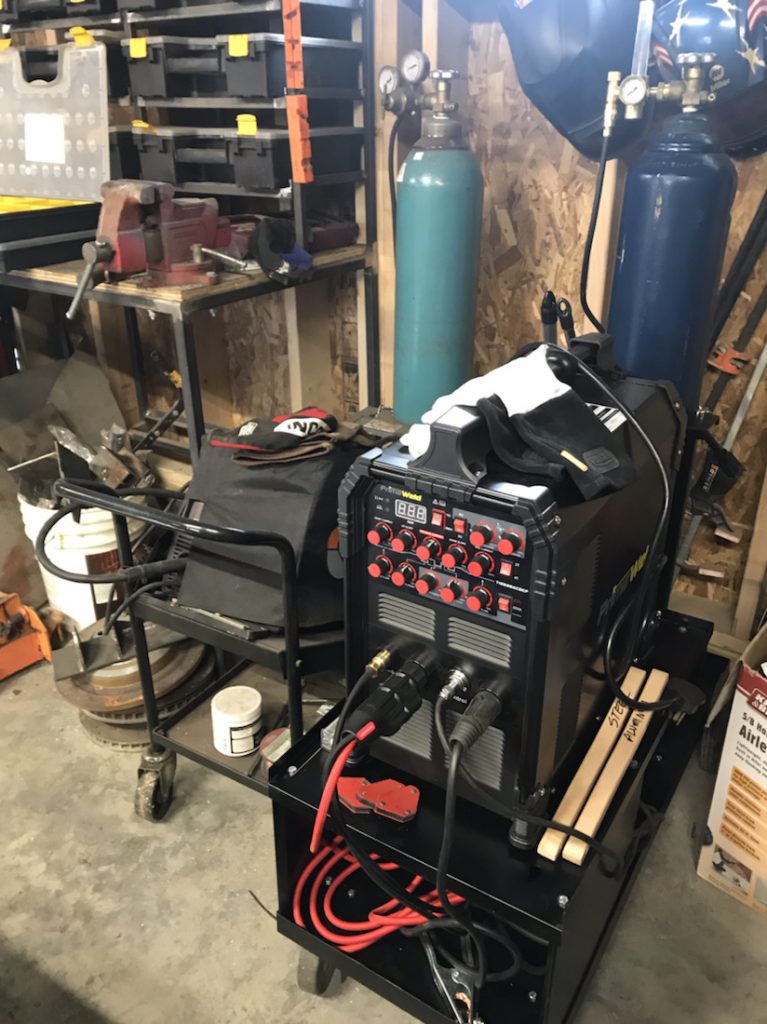
I’ve been wanting a TIG/Stick welding machine for some time. Not because I need one, but because I want to learn how to TIG weld. I looked at a number of options, trying to stay budget friendly. I ended up getting this TIG 225X machine from Primeweld.
It’s been getting pretty good reviews, especially from some welders that are fairly critical of inexpensive chinese imports.
What sold me on it was not just the price at $775, but that it does pulse as well as AC welding – which means I can weld aluminum!
It came with a CK Worldwide torch and an upgraded foot pedal. I picked up a bottle of argon from a local welding suppliers, as well as some filler rod and stick electrodes from Harbor Freight.
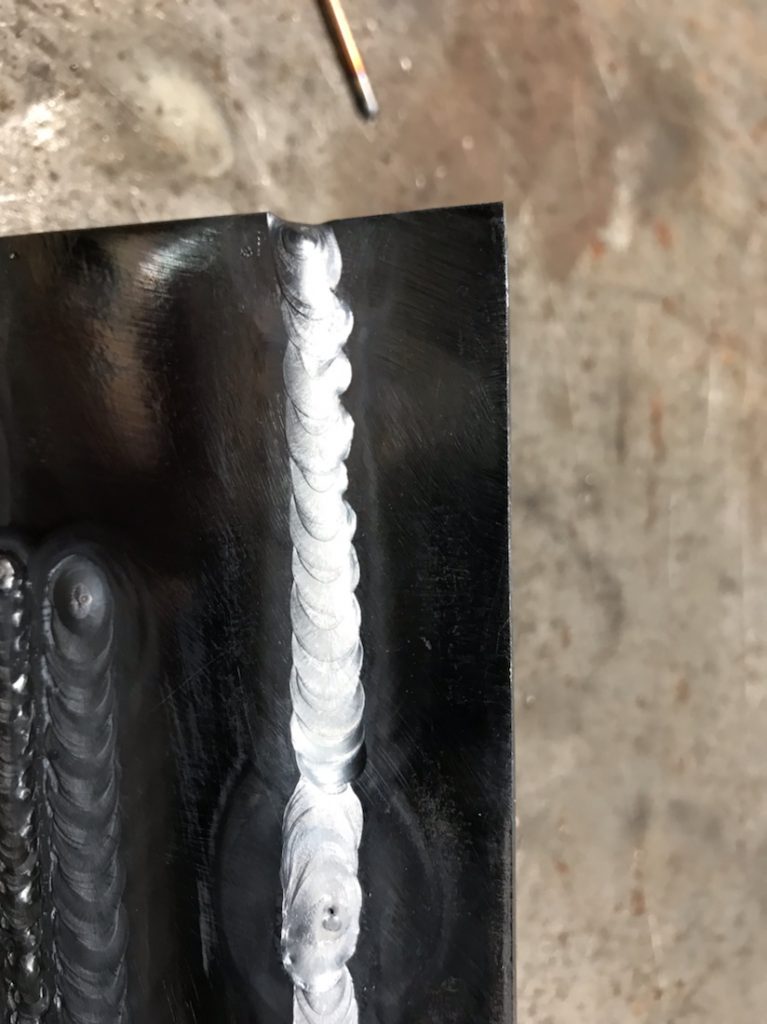
It’ll take a while to learn how to do all of this with some degree of acceptability, but it’s going to be a lot of fun!
Found an old welding cart on Facebook for $20. Cleaned it up and painted it. Perfect fit!
I finally have the compressor put back together. Replaced the failed gasket and torqued the head bolts down to 35 foot pounds. Had to replace the regulator valve – I cracked it trying to put the original back on.
There’s still a small leak somewhere that I haven’t been able to find. I’ll have to mix up some more soapy water and get it into all the spots and see if I can figure it out. But it’s such a slow leak, that it won’t matter that much.
It fills up extremely fast and keep up with 7.5 cfm at 125psi.
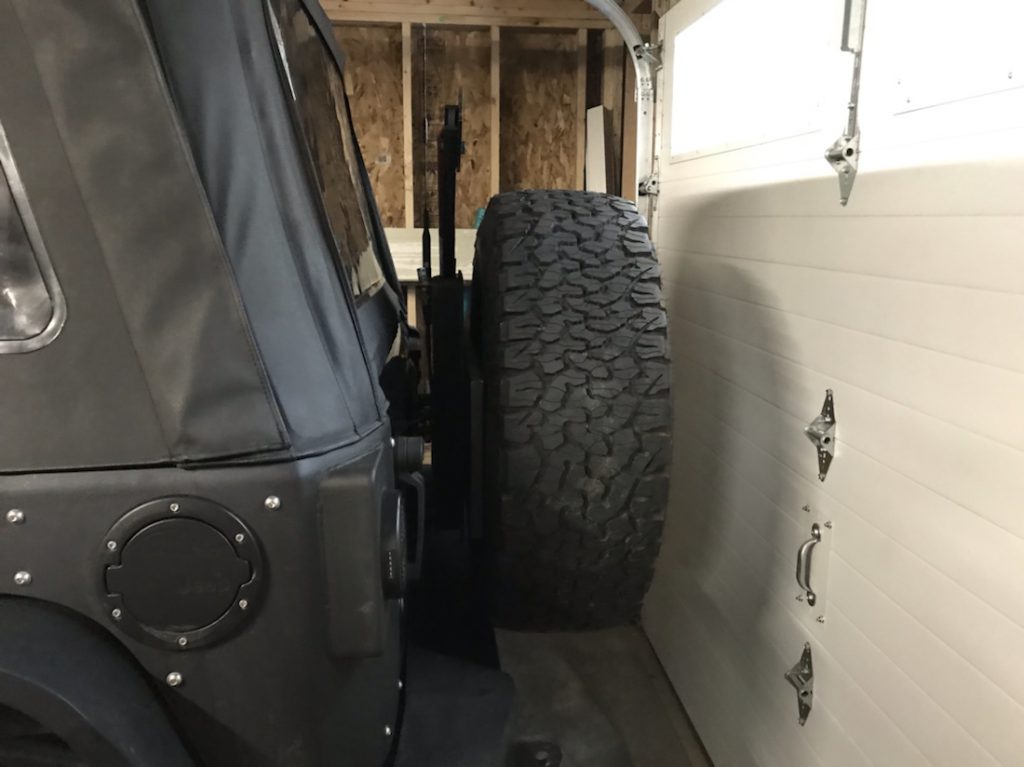
I rearranged the workshop for the winter months and pulled the Jeep in for the first time. It fits as closely as I expected.
I’m thinking of removing the spare tire to make it easier to get to the other side of the Jeep. I still have to put it up on jack stands to keep the tires from developing a flat spot.
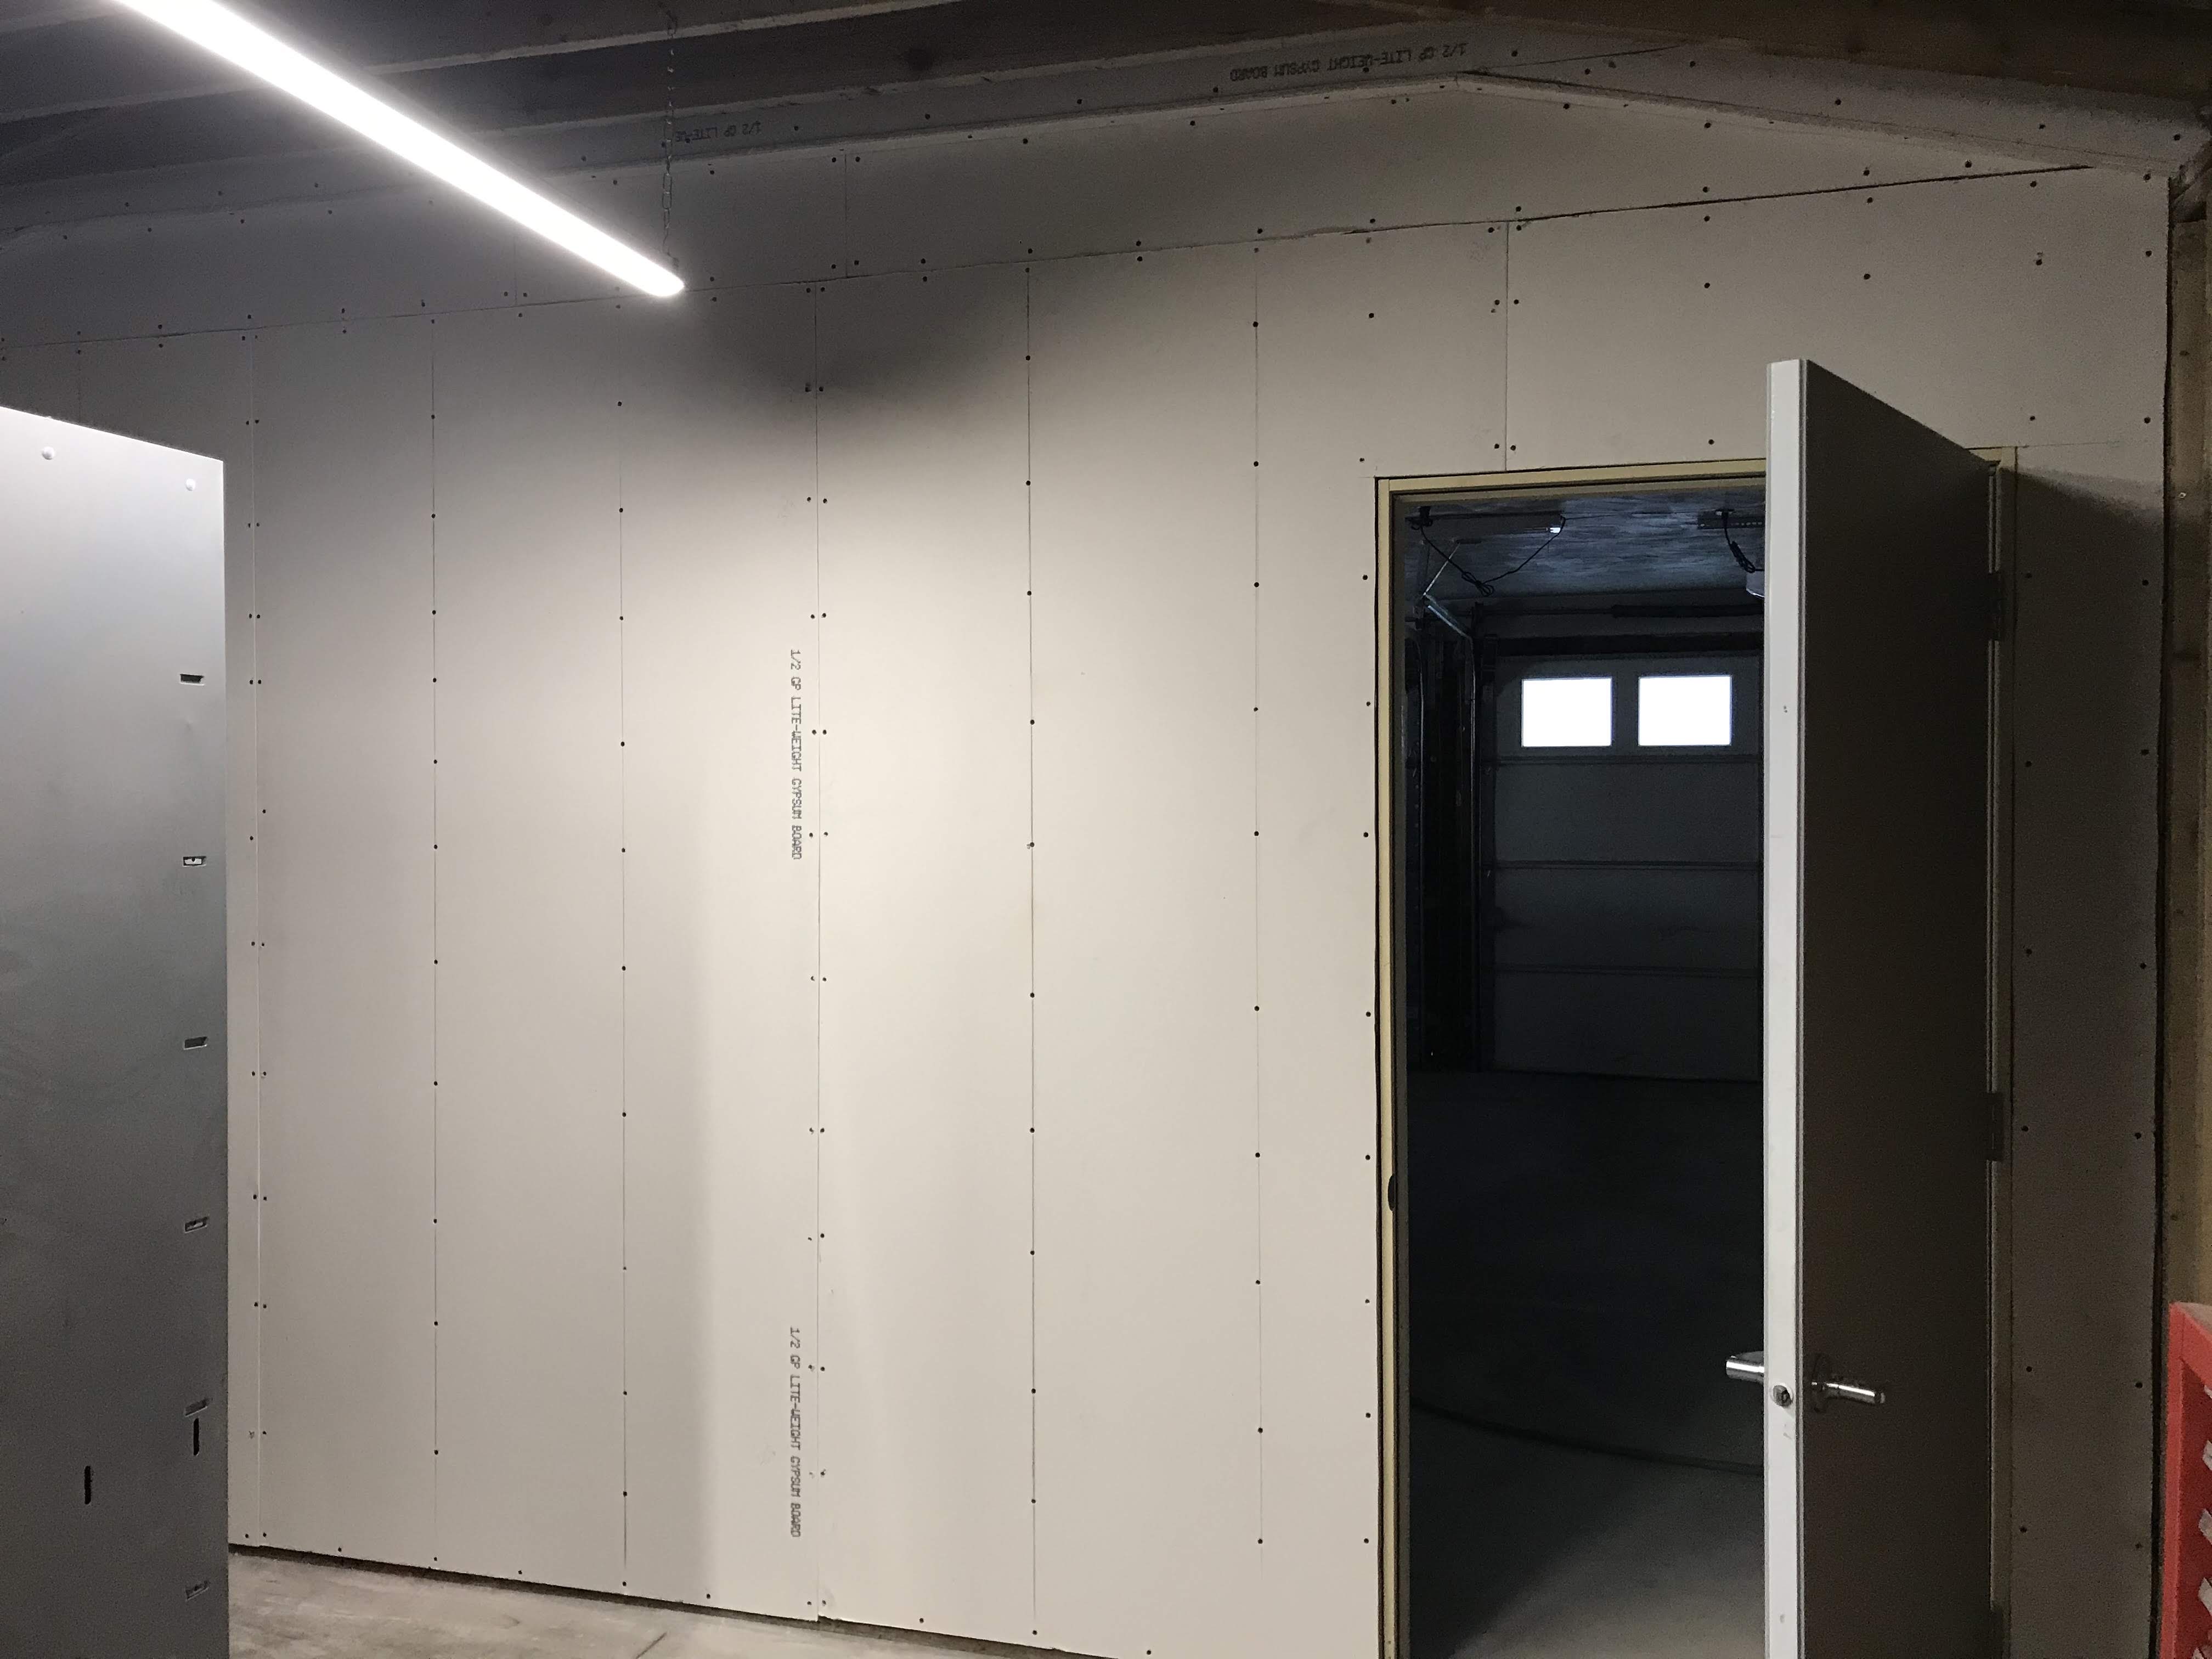
I thought the shop was ready for the final inspection, at least as it pertains to the original building permit. The inspector came and said code requires the wall separating a garage from the living space must be covered in at least 1/2″ drywall.
Apparently, the garage between my shop and the living space does not suffice.
I have the inspector coming back to see if this is good enough. Drywall from floor to roof sheathing.
UPDATE: Inspector liked it. All inspections passed and approved.
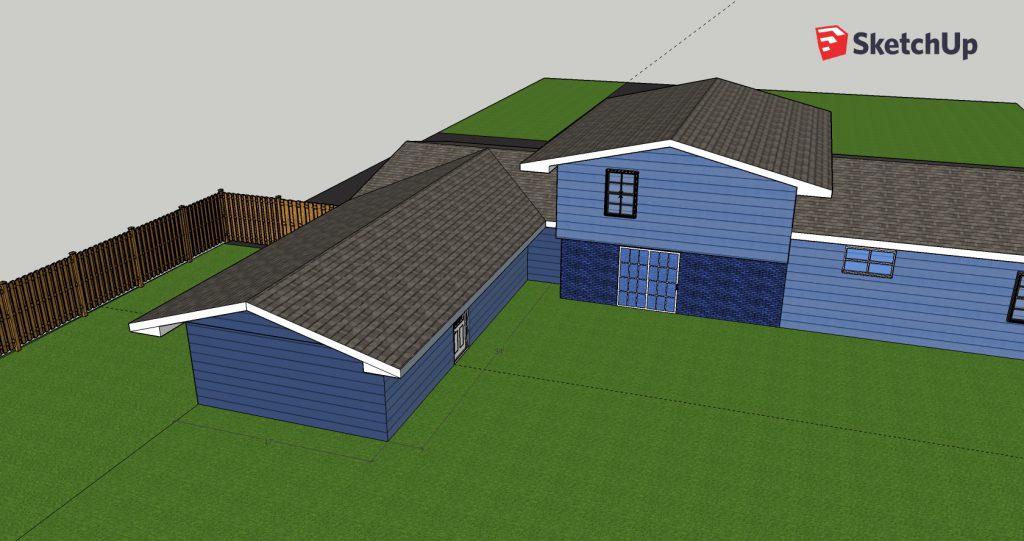
I started with SketchUp – a free online 3D modeling program. I first created the house and garage, the figure out how big I wanted the shop. I took these to an architect that created plans and drawings I used to get the building permit.
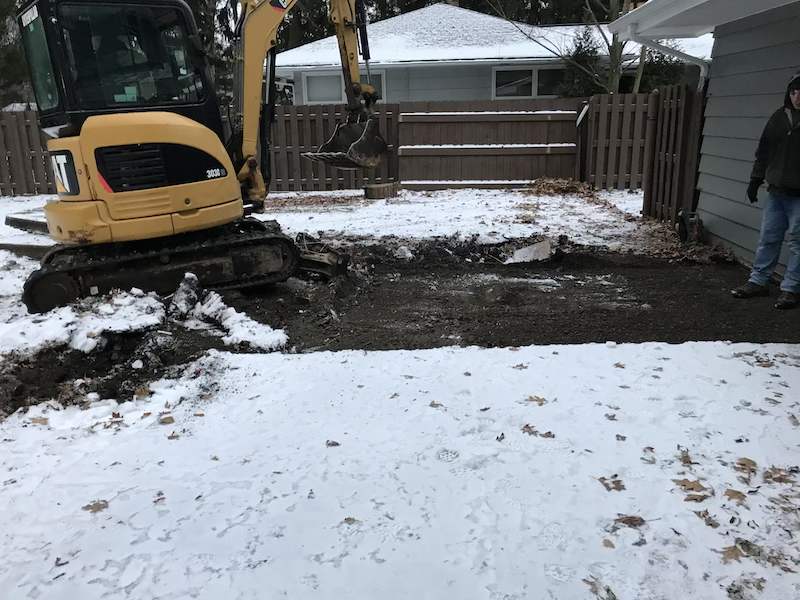
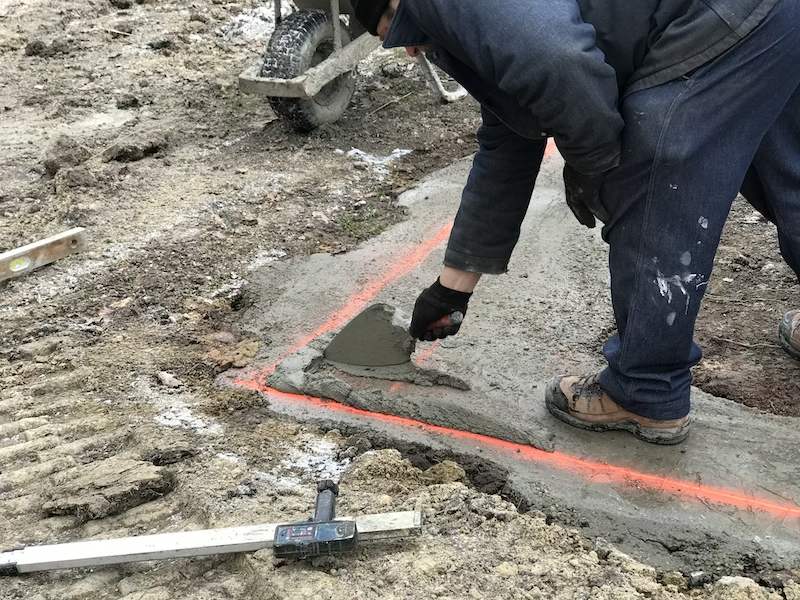
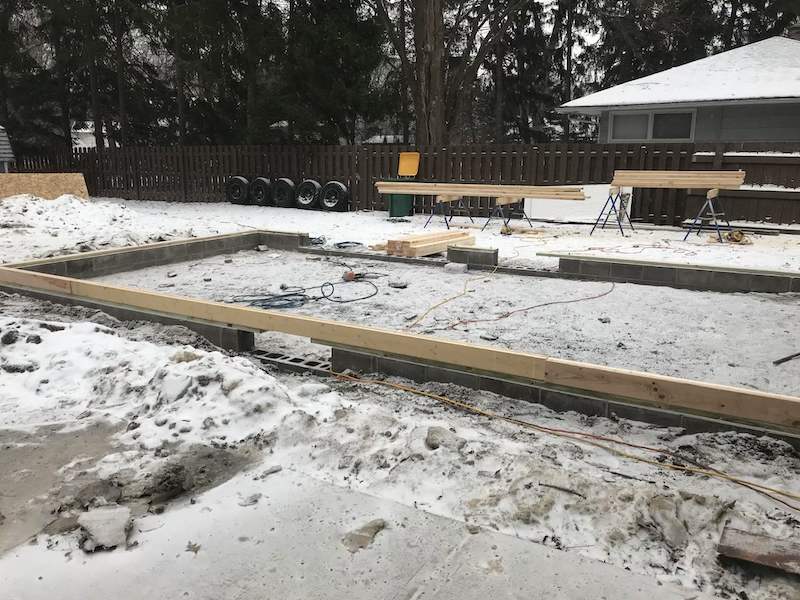
Step 2. Dig and pour the foundation
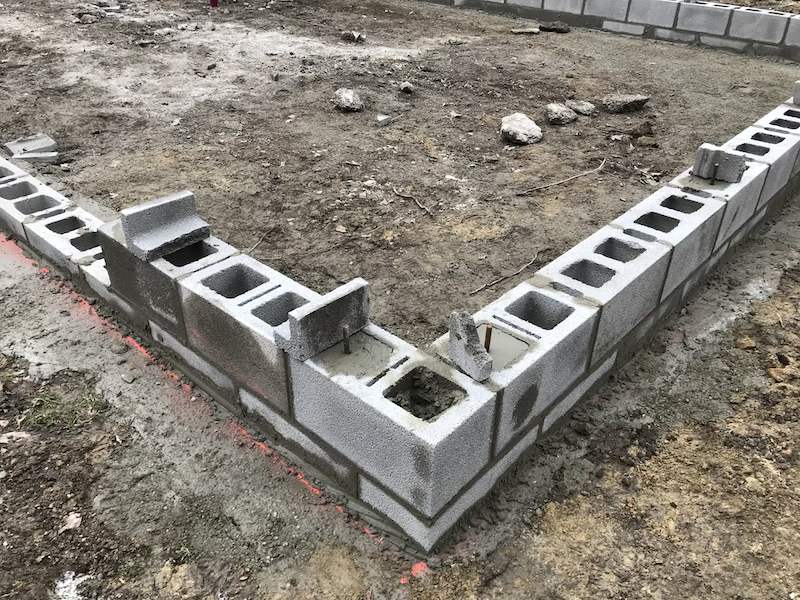
In some ways, this was the hardest part. I called multiple concrete contractors and couldn’t get a call back from most of them. I found this Amish man through another contact. He used his excavator to dig a 12″ wide trench footer, 36″ deep. He also set the foundation blocks.
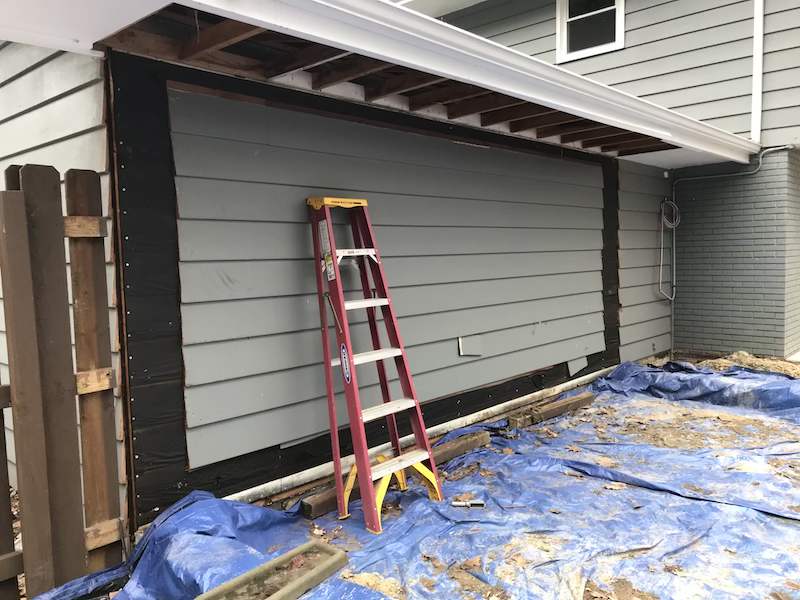
Step 3. Deconstruction
I had to remove part of the back of the garage to be ready for the carpenters.
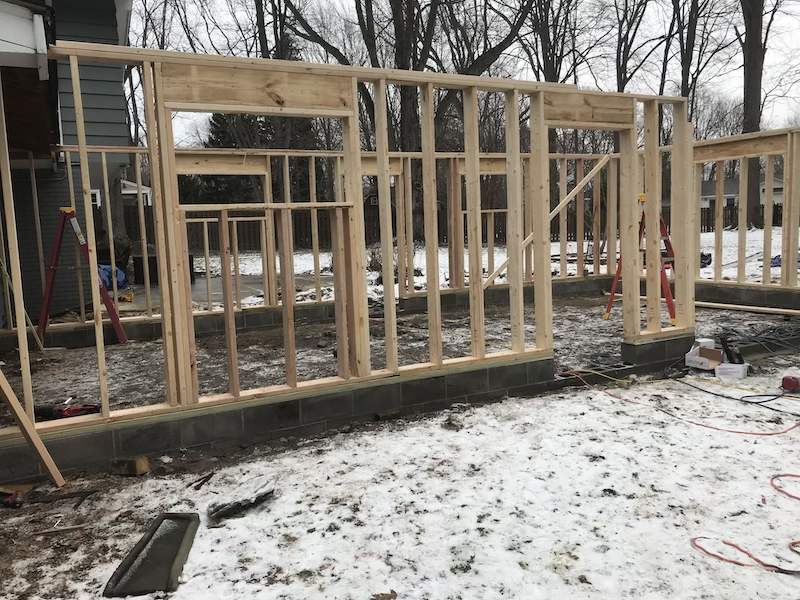
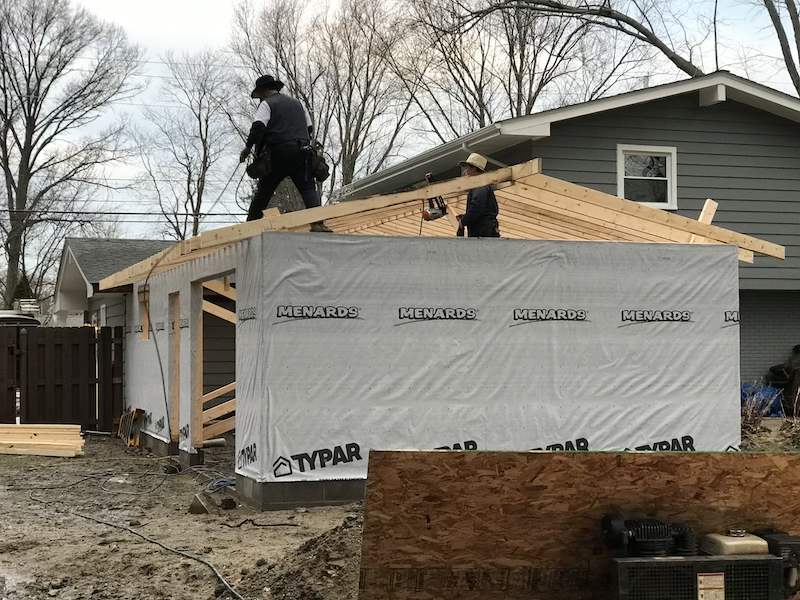
Step 4. Frame the main structure
I ordered all of the building materials from Menard’s and had it delivered. I’m a big fan of that store. Everything I bought, I made sure to wait until they had an 11% rebate sale going on. The lumber alone netted me $455 in rebates.
I used an Amish construction crew to frame the main structure. I have never seen a more efficiently working group of people before. All of the framing, sheathing and roofing was done in two and a half days by 3 men.
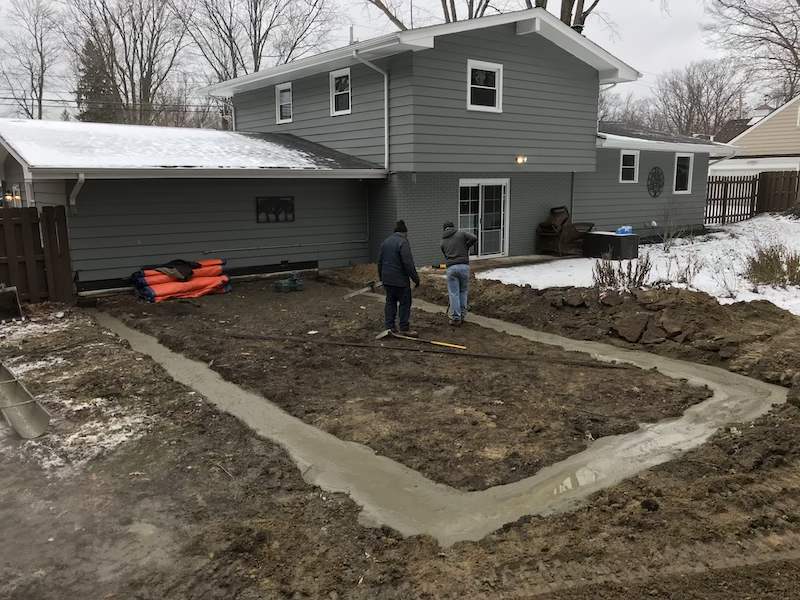
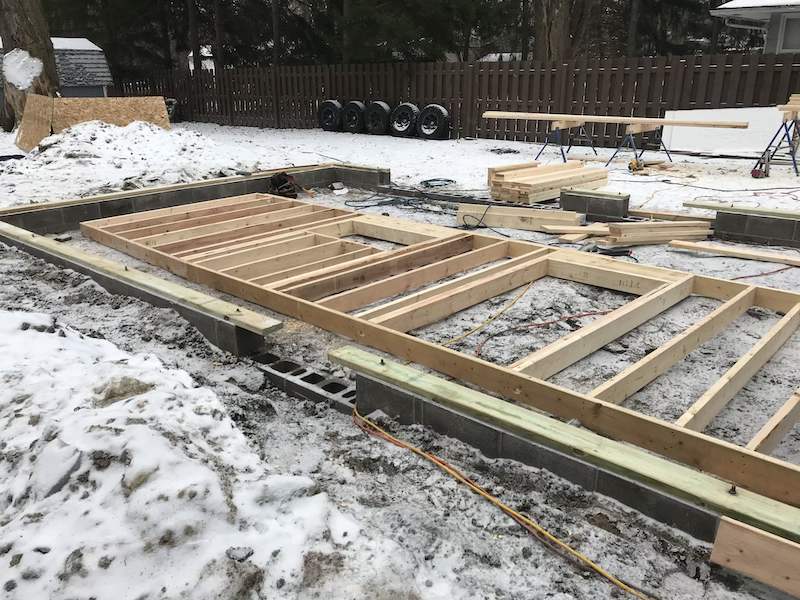
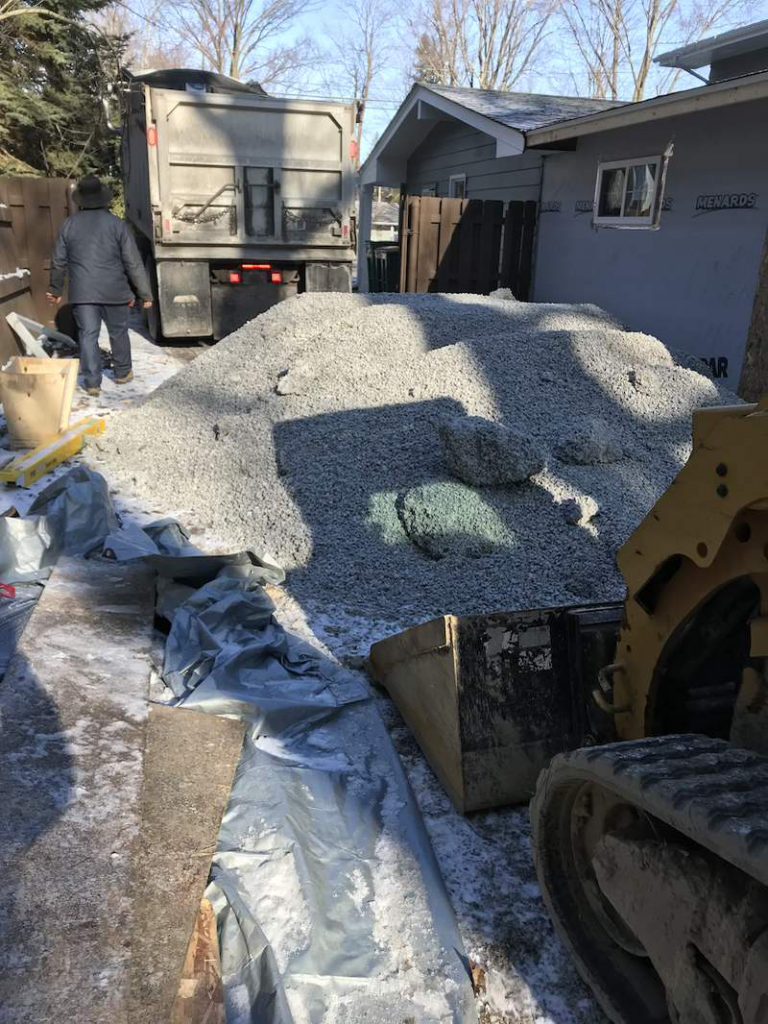
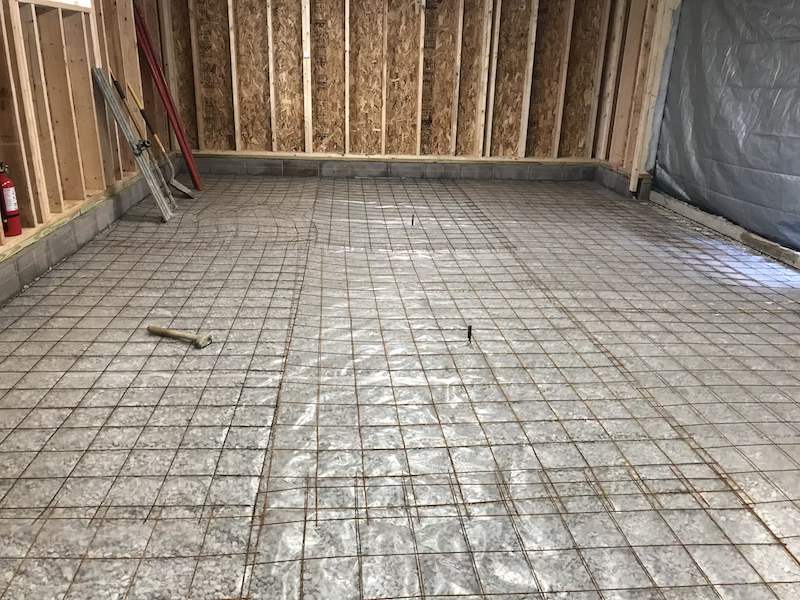
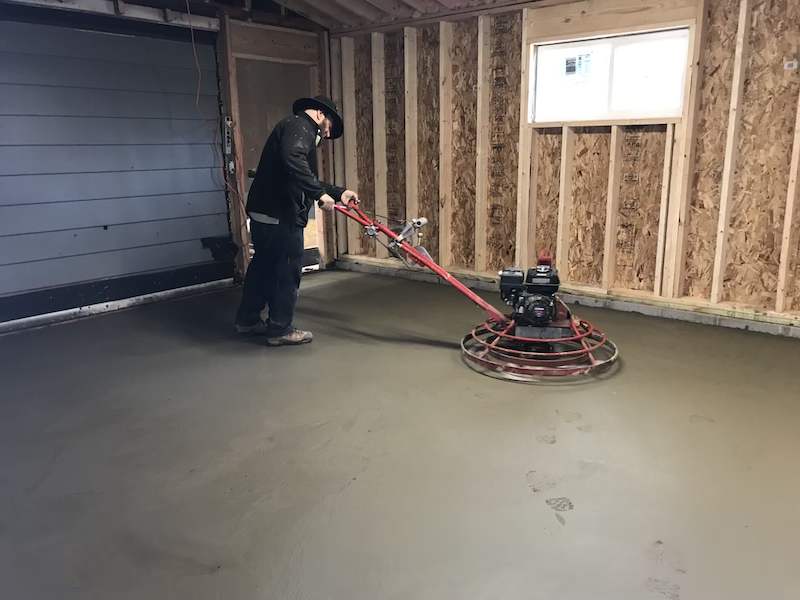
Step 5. Pour the pad
The Amish man that poured the footer came back and poured and finished the interior pad. Because it was so cold at this point, we needed the structure built in order to have some containment of heat for the pad concrete. I also ran a diesel torpedo heater over the weekend to keep it warm in the shop.
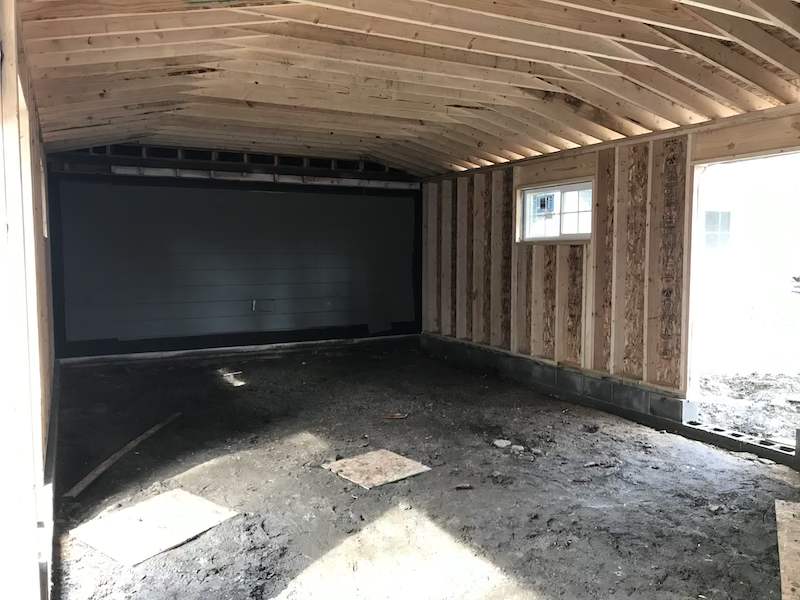
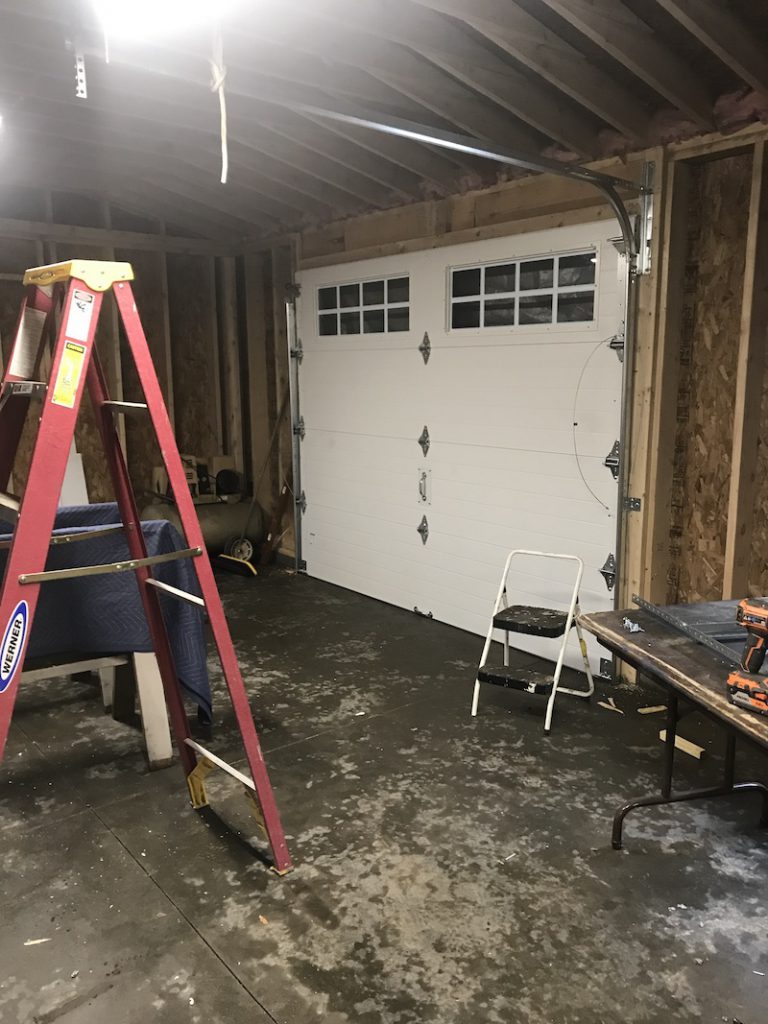
Step 6. Install doors
I installed the overhead garage door and the two walk doors with the help of a friend. The overhead door is insulated (R-12.9) and has a carriage door design. After all the rebates, it was practically free.
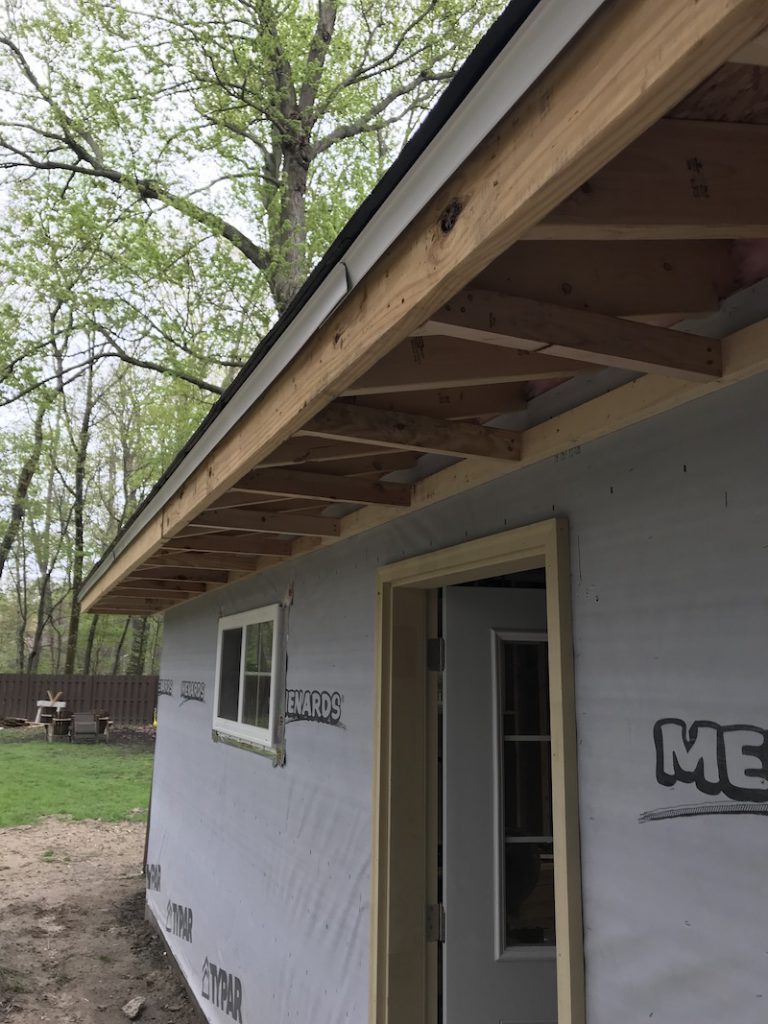
Step 7. Soffit and fascia
The carpenters left me with the rafter tails and the sub fascia. I needed to install the lookouts for the soffits, the soffit material and the fascia. For the soffits, I used Allura fiber cement vented soffit board. For the fascia and the overhead door trim, I used MiraTEC engineered wood. I love the wood grain look.
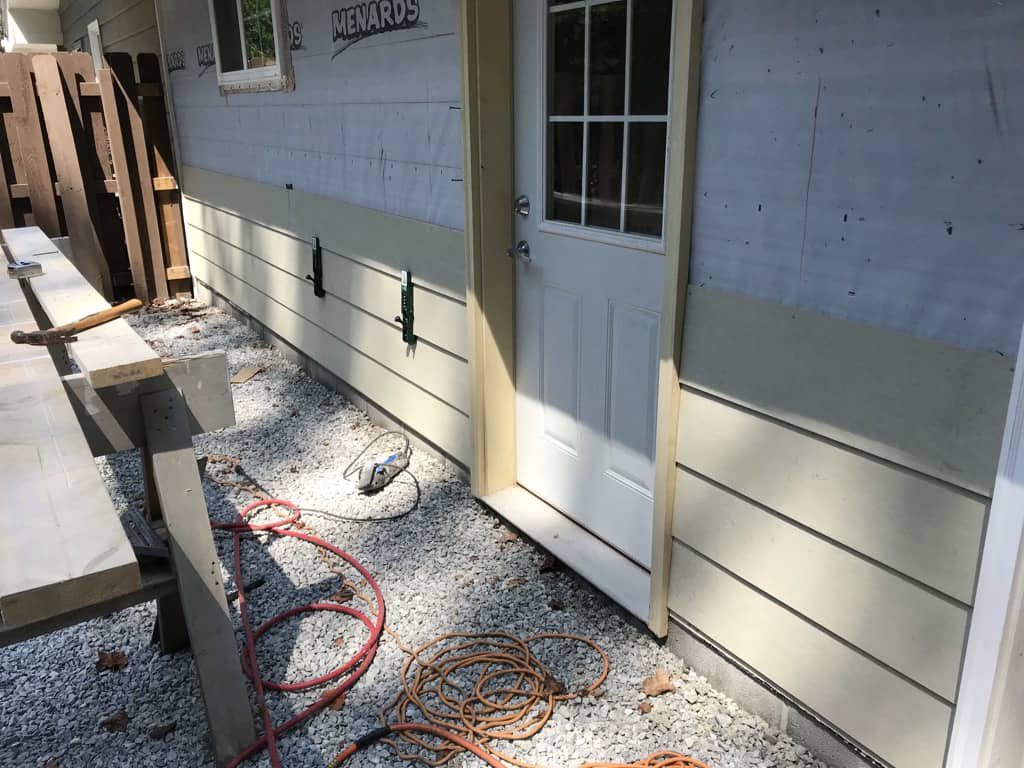
Step 8. Siding
The existing house is sided in 3/4″ cedar clapboards, with an 8″ exposure. Although I would have loved to use the same material, it was just cost prohibitive. I opted to use Allura fiber cement siding. It comes in a 9 1/4″ wide board, 12′ long. It’s fire rated and has a 50 year warranty. Plus, it’s about 1/2 the cost as cedar. Once I got the first course on with some help, I was able to finish the rest of it myself.
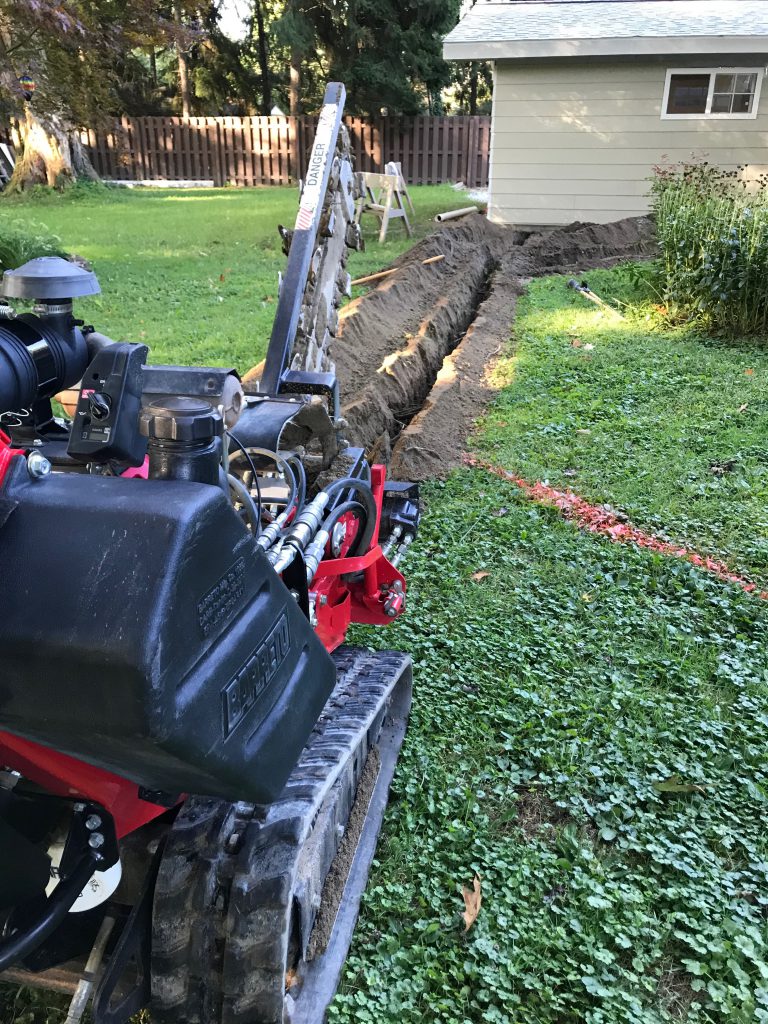
Step 9. Electrical
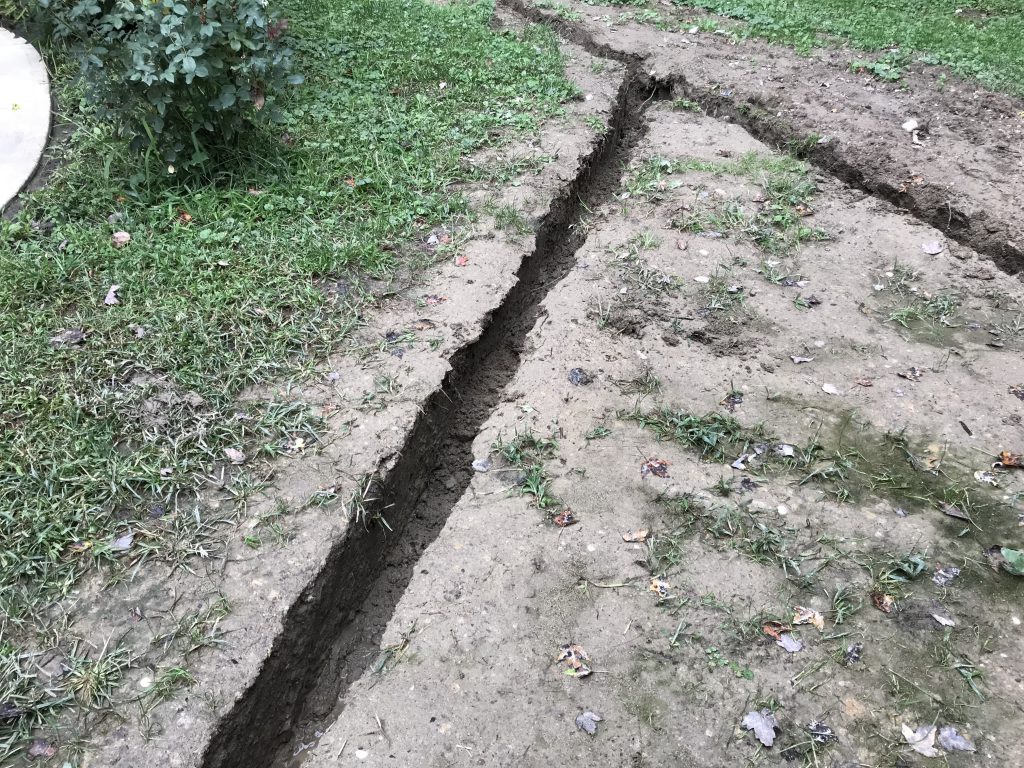
I rented a trencher to dig about 70′ of trench, 30″ deep to bury the feeder wire for the shop. There’s no way to get anything from inside the house to the shop. I wanted to have ample capacity, so I buried 2-2-2-4 aluminum which will be good up to 100 amps.
I also buried some 1/2″ conduit for a data line and a 1-1/2″ empty run of schedule 40 for a later run of a gas line for heat.
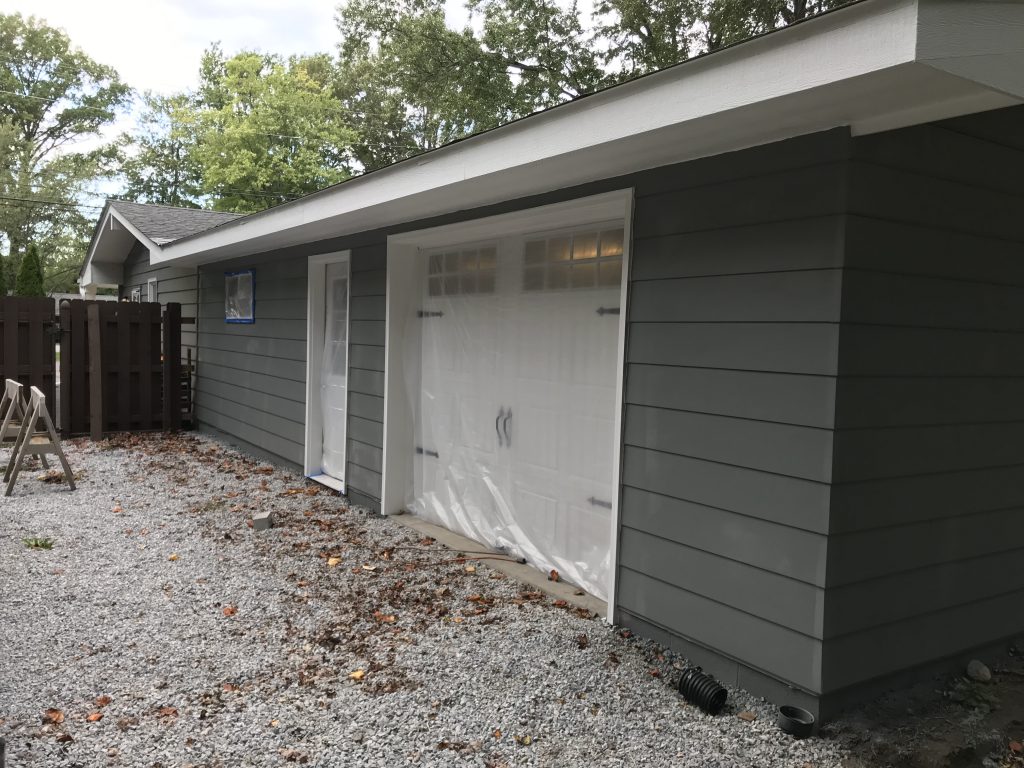
Step 10. Paint and gutters
The last thing to do was to paint the siding and trim and install the gutters. I used a roller for the soffit and fascia, brush painted the trim, but used an airless sprayer to paint the main body.
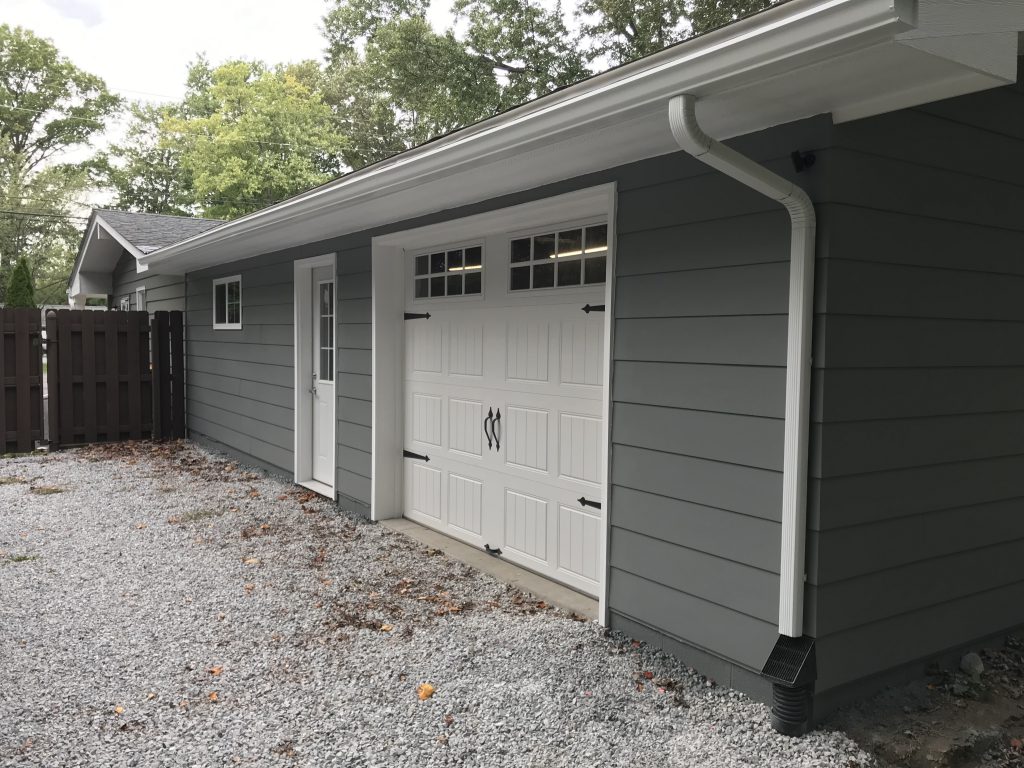
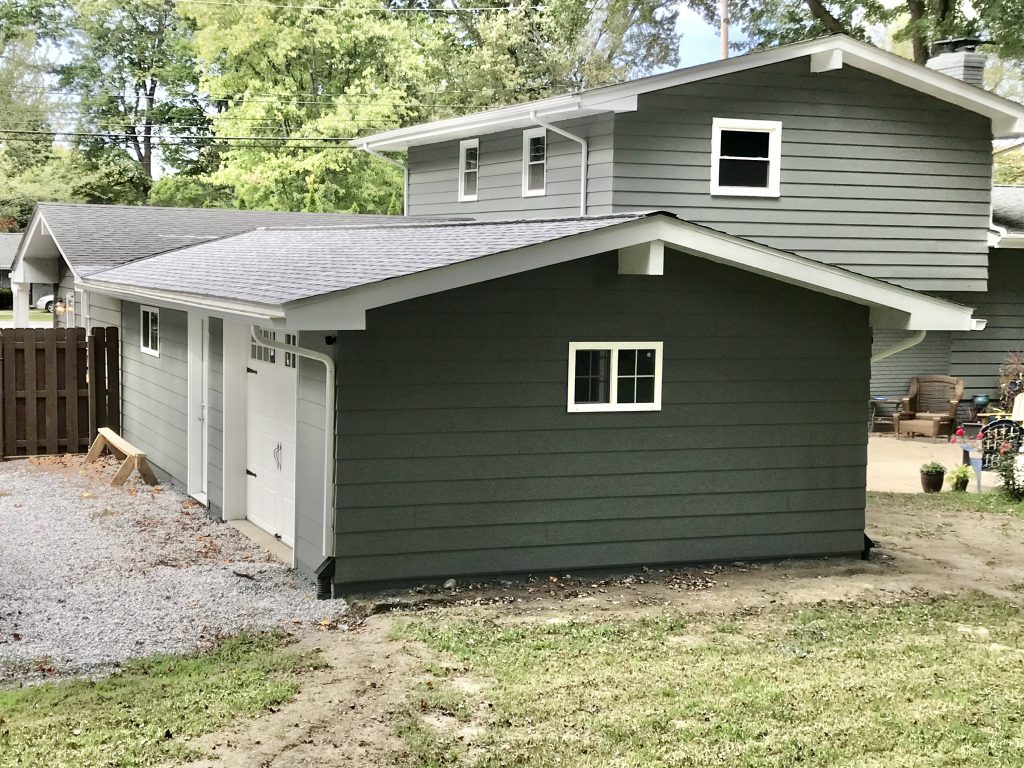
The finished project
I started the project in January and it’s now the end of September. I could have hired a contractor and let them coordinate everything for me, but I would have spent at least 50% more than I did by doing it myself. I wasn’t in a rush. I’ve been using the shop since the doors were put in, but I am happy now that it’s done.
Next year, we’ll get some landscape design done. I also plan to do the electrical work inside, insulate it and put 3/4″ plywood on the walls. I am thinking about using a corrugated tin for the ceiling, or maybe interior barn siding. Still a lot to do, but it feels really good to see it like this.
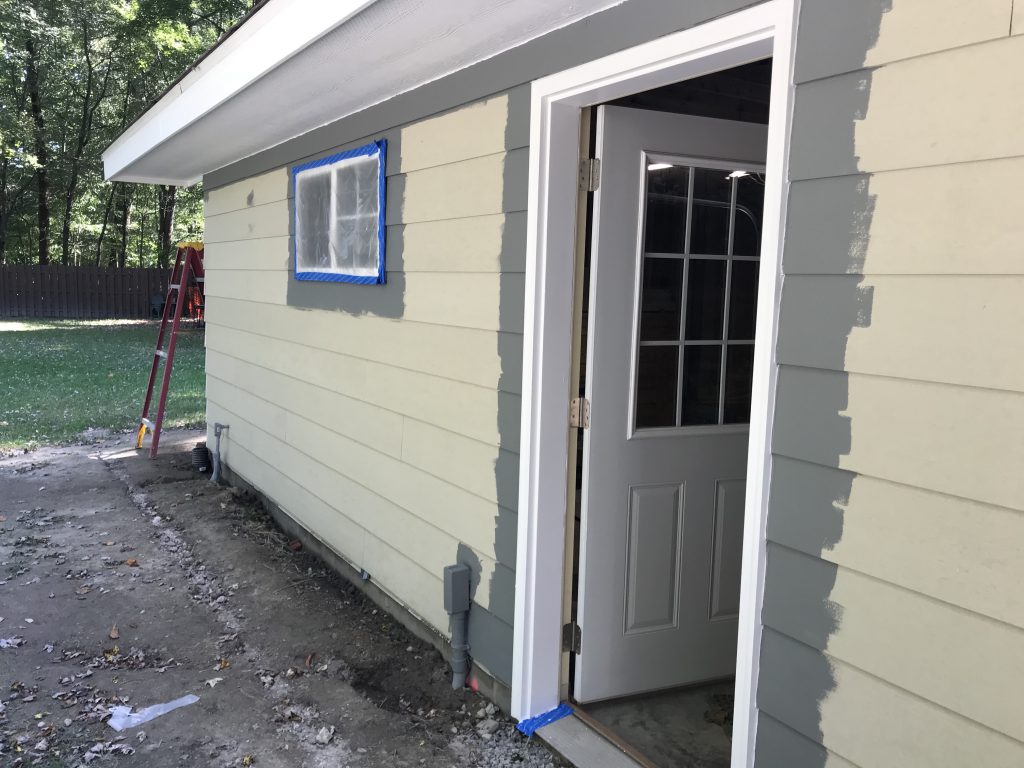
Now that the siding is complete (finished that off after the electric service was finished) it’s now time to paint.
I used paint from Sherwin Williams that matched what was on the rest of the house. When the house was last remodeled and painted, the remaining paint was left in the basement. This helped, since I felt I could get the most accurate paint match.
I started with the trim, soffit and fascia. I rolled it on for the soffit and fascia, and then brushed in the cut in and the trim. Two coats later and it looks great.
After that dried for about a day, I did the cut in for the main color.
I also painted above the doors and windows. There’s only about 550 square feet of wall, but an airless sprayer will make this a lot smoother and even coat. I had picked up one of these cheap ones from Harbor Freight a number of years ago and it has worked perfectly before.
This time was no exception. I got the first coat done in less than 2 hours, including setup and clean up.
I did manage to get a little overspray on the soffit. That cleaned up easy enough with some touch up paint.
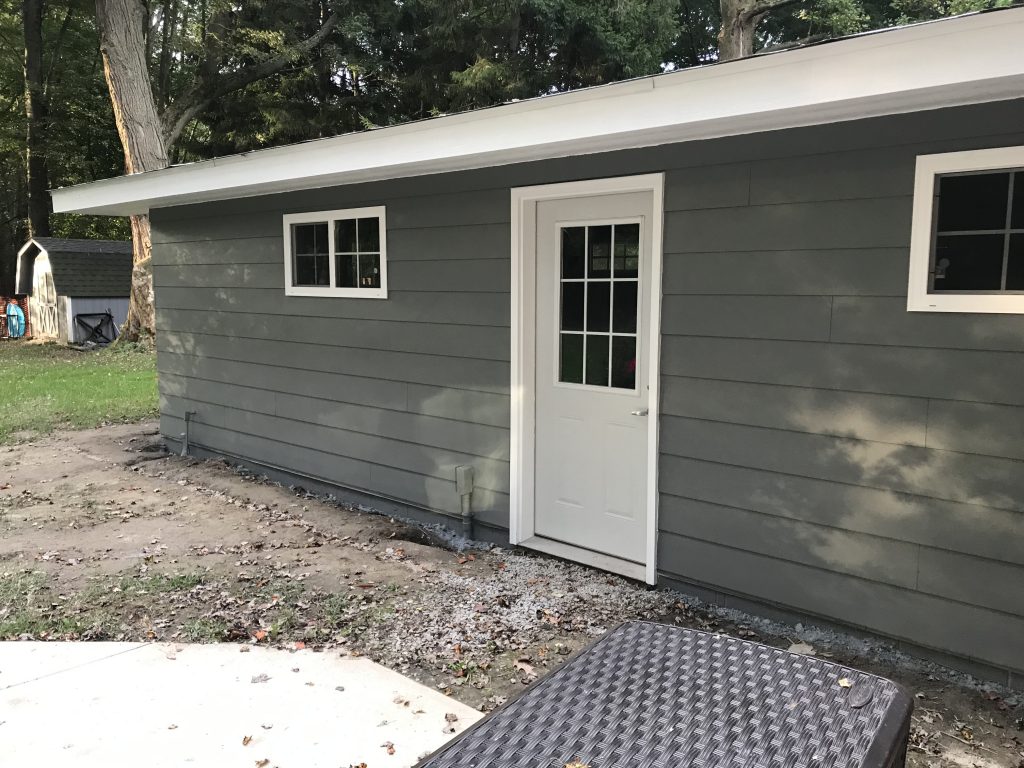
I waited a couple days to put on the second coat and remove the plastic and tape. Second coat took about an hour and a half, including cleanup. I did need to do a little touch up on the white where there was some overspray, but that only took about 30 minutes. The feed for the electrical service seems to disappear. Once we get this landscaped, you’ll never notice it.
The last thing I need to do is install the gutters. Again, I bought all of the components from Menard’s. The gutters came in 10′ sections and was just a matter of snapping an appropriate slope line, using some seam sealer and screwing it into the fascia.
The downspouts run into an underground drainage system that comes out in the yard, keeping the majority of the water away from the building.
I can finally take a break from working on the shop. I am done until next year when I figure out all the electrical requirements.
Purposely haven’t done much with where the trench for the electrical is. We’ve been waiting for some decent rain as I know it would help settle the soil. It has . I may plant some grass in mid October before it gets too cold.
Took a lot of work, and a lot of help from my wife, but I have power in the shop!
Once the trench was dug and signed off by the building inspector, next step was to lay in the wire.
Decisions, decisions
Figuring out what kind of wire to use took some research. Not being an electrician, I didn’t know exactly what to use. I reached out to my nephew who works in the trade for some ideas. He old me they use two different types of wire, SER and URD. SER is a service entrance wire and URD is an underground wire.
They both would not work for me, according to the building department. SER cannot be buried. Not even in conduit. URD can be buried, but since it’s not fire rated, can’t be used inside.
Then I stumbled upon MHF, mobile home feeder wire. Not only can it be buried directly, but it’s fire rated for indoor use. And the building department agreed. Perfect!
Running the feed wire
The stuff is not too heavy, and a little unwieldy. It’s 4 conductors, 3 each of #2 and one #4, all aluminum. The #4 is green for the ground, and one of the three #2 conductors has a white line indicating the neutral return. And at only $1.37 a foot after rebate (have to love Menard’s) it’s way cheaper than copper. Not having to pull this through a conduit was the icing on the cake.
The only conduit I needed was to run it into the shop. Code requires conduit 18″ below grade. I ran conduit from outside the house into the sub panel and tied it into a new breaker. I’m still only feeding this panel with a 50 amp breaker, even though the new breaker and the load center in the shop both are both 100 amp. If I find that I am tripping this breaker, I still have some #2 wire I will use to update the feed from the main.
Finishing it all off
Last thing to do was to fill in the trenches. This will take some time. Need to let everything settle for a few weeks before cleaning up the extra dirt and planting grass again for the third time. Something tells me I’ll be planting in the spring, too.
Wow. I am amazed this house didn’t burn down. I never noticed this before. But the sub panel in my basement, the very panel that I plan to feed that work shop from, was hiding a problem that had developed over the last 2 years.
Before and After
Here’s a picture of the inside of that panel I took when the house was being inspected. This was 2 years ago.
Very simple panel, nothing mysterious. All work either done or supervised by a licensed electrician.
Here’s a close up of the same panel today. Notice anything different?
Several of the neutral connections have charred/melted insulation and the plastic bracket holding the neutral bar is partially melted. The problem, missed by the inspector (as good and thorough as he was) is that second screw from the bottom. It was looser than the others. This created a gap, which allowed the current to arc, which generated a lot of heat. I have no other explanation. This panel is only fed from a 50 amp breaker and there was no other damage in this box or the main box.
I was able source a new load center from Menard’s and pulled the insert from it. After disconnecting the power to this sub panel, I removed everything from it and replaced the damaged insert as well as any damaged wire.
A little paranoid
That panel cover is going to stay off for a while, with a fire extinguisher close at hand. Even though I am positive I won’t need it, I’m a little on the paranoid side right now.
I also went through and checked and tightened every neutral wire in the both breaker boxes.


 I may plant some grass in mid October before it gets too cold.