Sigh

The adventures of a Jeep and its driver.
Took it to Southington for a dry-run. Everything seems to work as planned. I didn’t go too rough on any trails. Just enough to see how the lockers were working – and they did great! Can’t wait to push it even more.
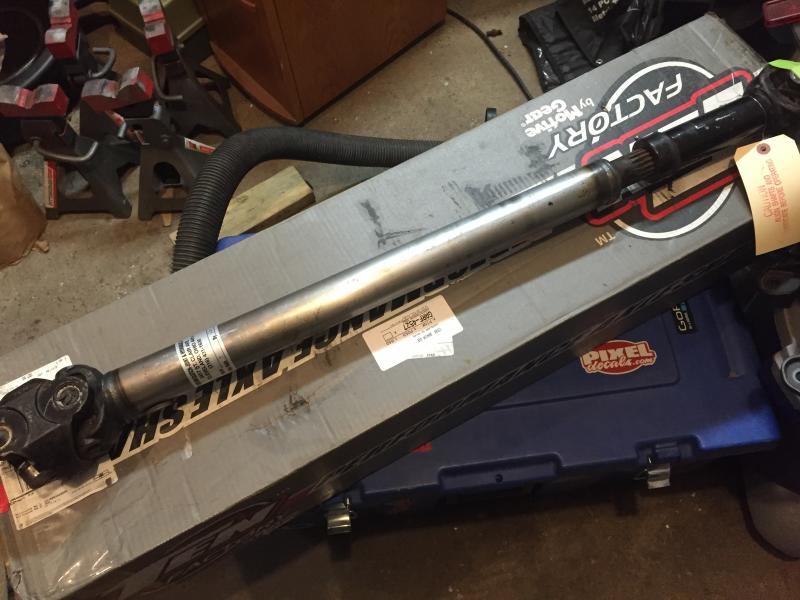
The paranoid part of me was feeling a slight vibration at around 65 Mph after installing the lengthened driveshaft with the conversion u-joint on it. So I took it off and took it back to Cleveland Clutch. They rebalanced the shaft. Put it back in and I still feel the same, very slight, vibration. It may just be in my head, or it could be something else. Not sure. The front pinion angle looks OK, but I don’t have an accurate enough angle finder to trust it. I know it should be a couple degrees off from center, and my bubble gauge seems to read just that. It’s a double cardan joint at the t-case, so I know that input/output angles do not need to match. My mechanic seems to think that it’s OK. It could be a tire ever so slightly out of balance, pinion bearing, or my imagination.
Leaving for Tennessee on the 27th. If my t-case doesn’t explode, I guess I’m OK.
I finally installed my Ace Engineering door hangers I bought last July. These things are really nice. I mounted a couple of sections of 2×12 to a couple of the studs, then mounted pieces of 2×4 to them vertically. I lagged the hanger into the 2×4’s. Without the 2×4’s I wouldn’t be able to flatten the doors against the wall without the mirrors hitting. They’re pretty much going to stay here 90% of the summer. For longer trips, the doors go back on. The soft doors are too damn noisy.


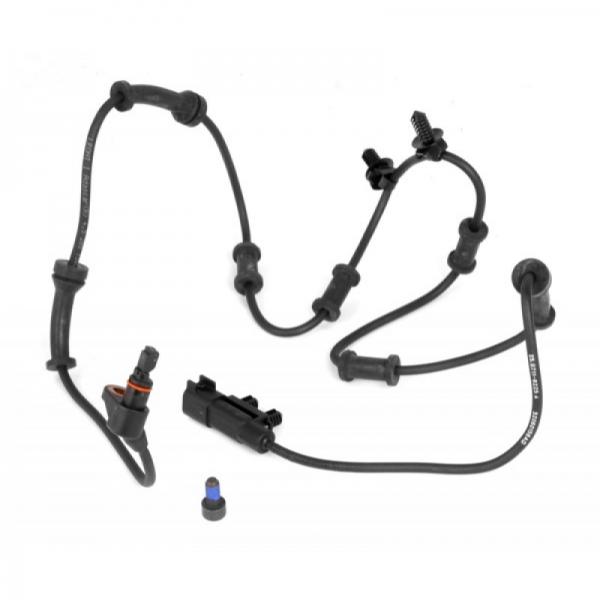
New ABS/wheel speed sensors installed (no pictures). Pretty easy to swap if you don’t have that stupid dust shield in place. So glad I didn’t put those on. The hubs were so new that taking the old sensors out was a breeze. The new wires are a full foot longer than the old ones. I zip tied them to the brake lines and they are the same length. If I’m popping one, I’m likely to lose the other.
The remaining to do items list is getting shorter. I need to check the front diff fluid again. I’m not 100% sure I have the right amount in there. I checked the level this morning and it was darker than I expected it to be. Not sure if I need to be concerned about this or not.
Trying to get this axle swap buttoned up. A few small details remain.
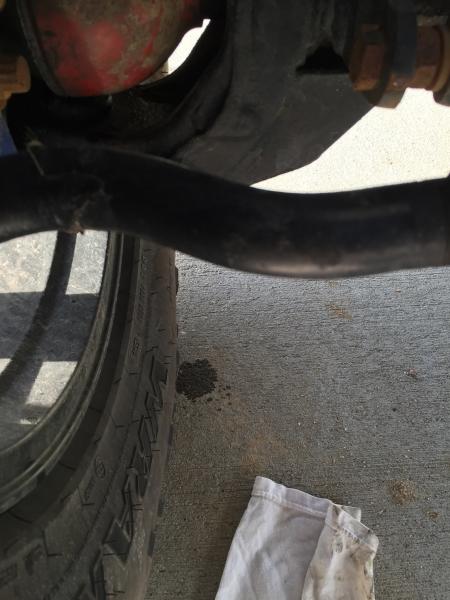
Painted the drive shaft yesterday. Went to put it in this morning. Did you know you can’t mate a 1310 U-Joint on the end of a drive shaft to a 1350 yoke on the pinion of the axle? Of course, I did, but what I didn’t realize was that the pinion yoke on the axle was a 1350. Oops. I have no idea why I didn’t pay attention to that. Of course, I realized this AFTER I had attached the shaft to the t-case.
Got lucky and Summit Racing had a Spicer 1310/1350 cross over U-Joint and a set of 1350 U-bolts. I’ve never replaced a U-Joint. YouTube to the rescue! Found a video that explained it very well and gave me the confidence to take care of it myself.
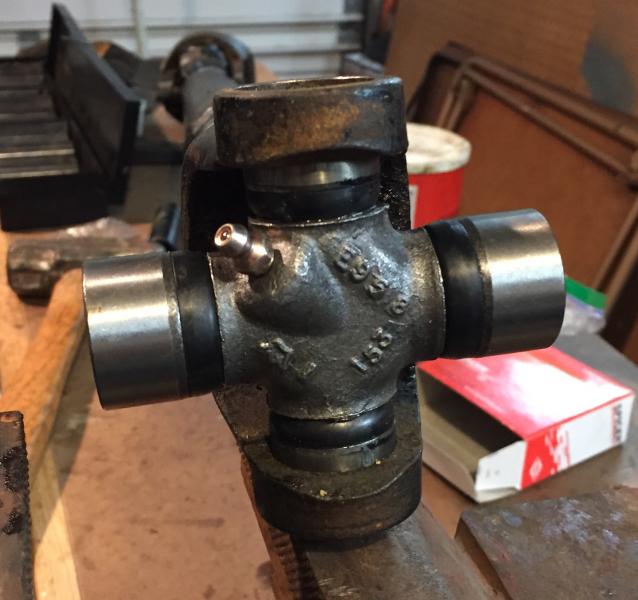
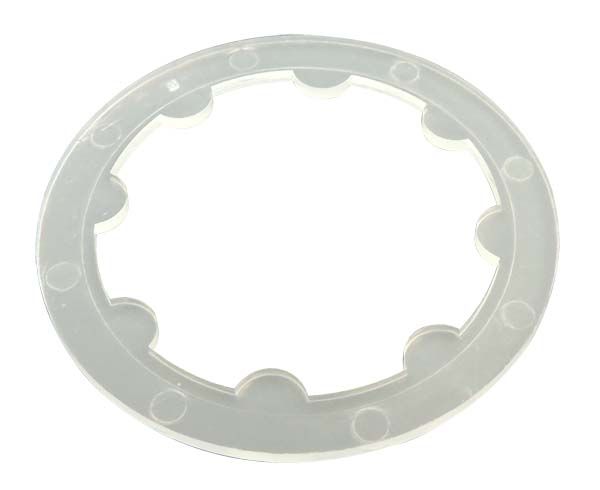
I am a little disappointed that they only had a greasable joint. The other u-joints are all solid.
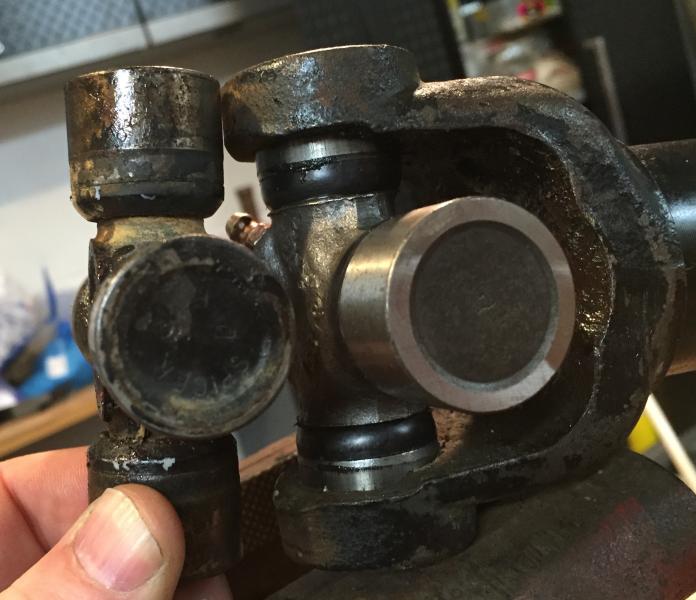
You can see the size difference here.
Got the front locker wired up so I could put the dash panel back together. I put the locker power switch in the lower dash panel where my lights are controlled. I put the locker switches in the dash panel to the left of the steering wheel. All parts came from OTRATTW, minus the blue locker indicator LEDs.
The locker power switch is fed by a switched 12v supply, so it can only be powered when the ignition is on. This energizes a 40 amp relay which feeds, through a 15A fuse, the front and rear locker switches themselves, which in turn supply power to the lockers. I did not add a relay between the locker switches and the lockers. I felt that was redundant and unnecessary. The indicator LEDs are powered from the battery directly and get a ground from the locker indicator plungers in the diff housing.
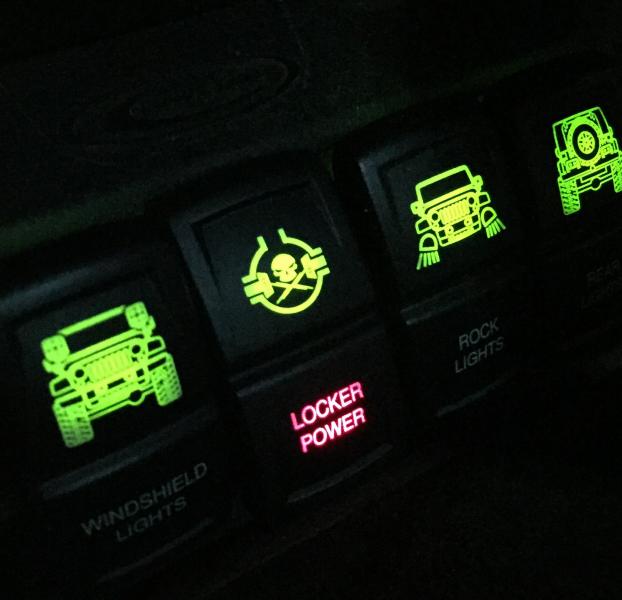
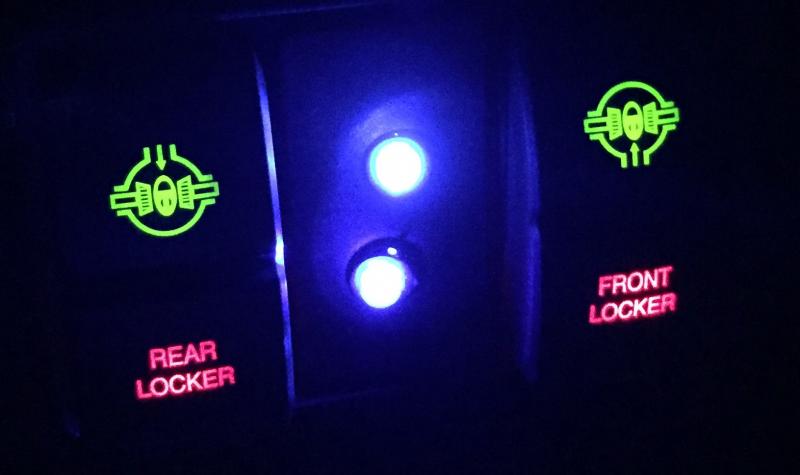
So the lockers cannot be engaged with the power switch off or the ignition off. But, if something is wrong, the indicator lights should still light up if the locker is stuck on. I’d like to say that the LEDs are purposely off centered. Maybe one day I’ll fix them. It’s just a blank panel in the middle that’s removable. Next time I order from ORTATTW I’ll replace it. I’m in no rush.
The last detail is to replace the ABS wheel speed sensors. The cables that came with the new hubs were only 24″. The stock ones are 36″. As much as my axle droops, I’d rip out a sensor on the first wheeling trip.
Got the drive shaft back from Cleveland Clutch the next day. Very quick turn around. I am going to paint it, however.
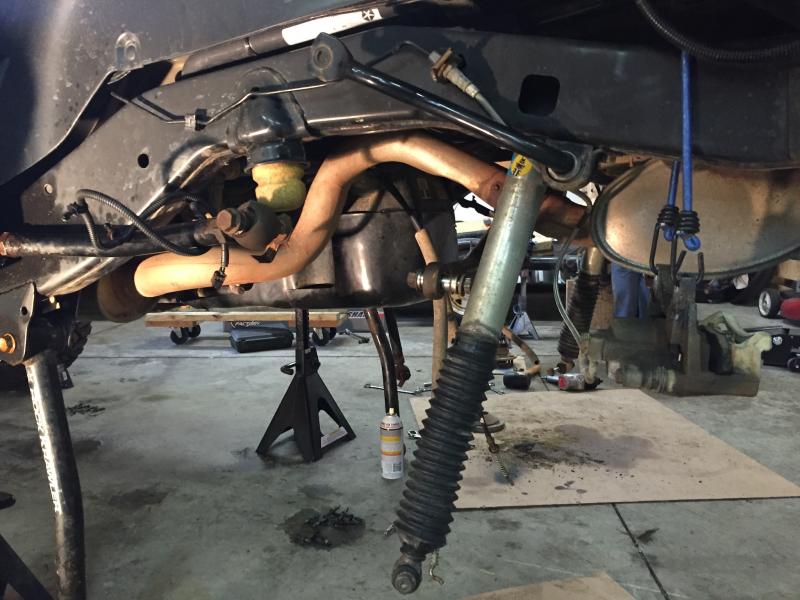
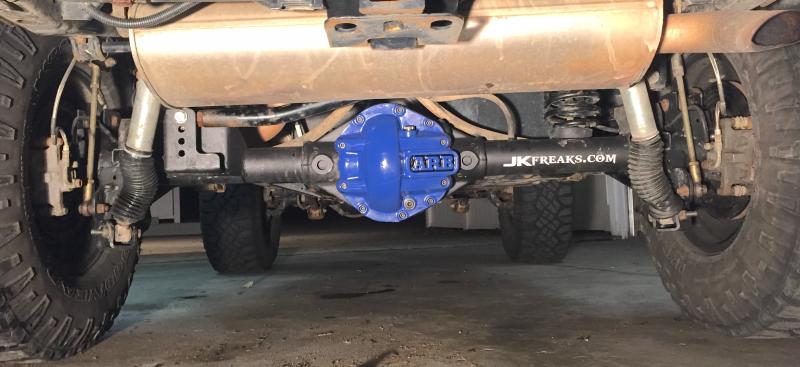
Took an angle grinder to the Barnes 4WD rear track bar bracket. The Rock Krawler track bar is so fat that it was hitting the bracket.

I also had to rotate the track bar back a little. It was hitting the diff cover a bit. With it rotated, the bend will pass by the cover. The ARB cover is just so thick.
A couple more things checked off the punch list!
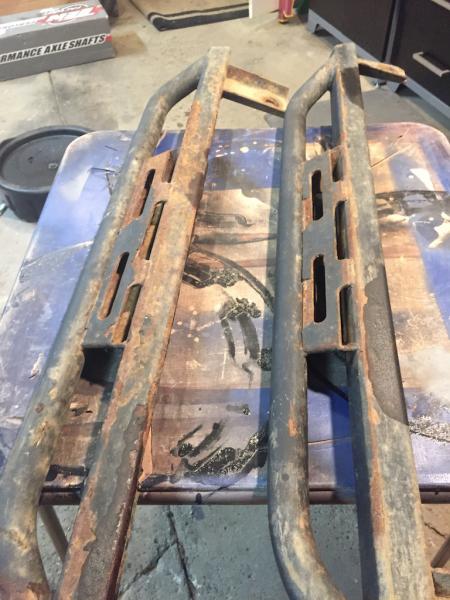
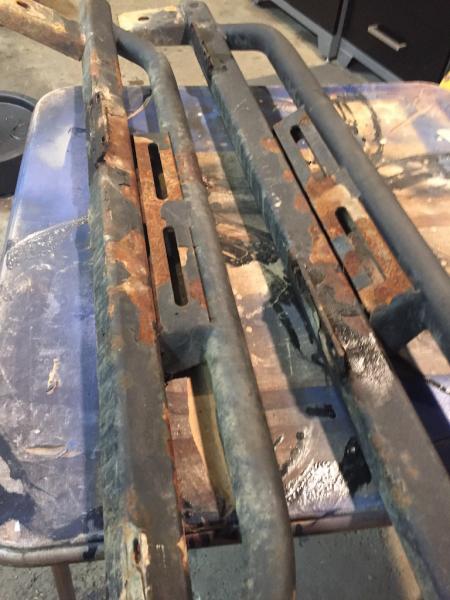
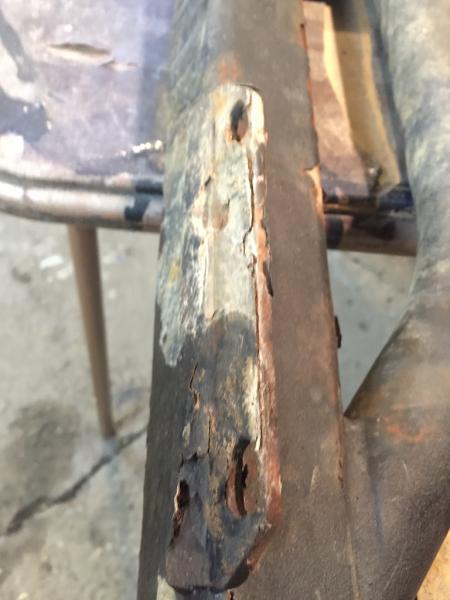
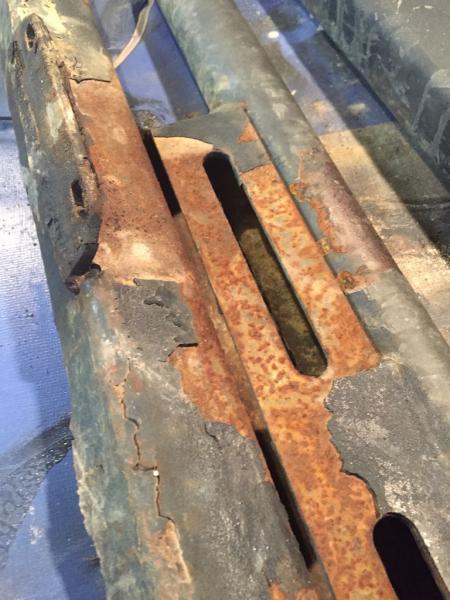
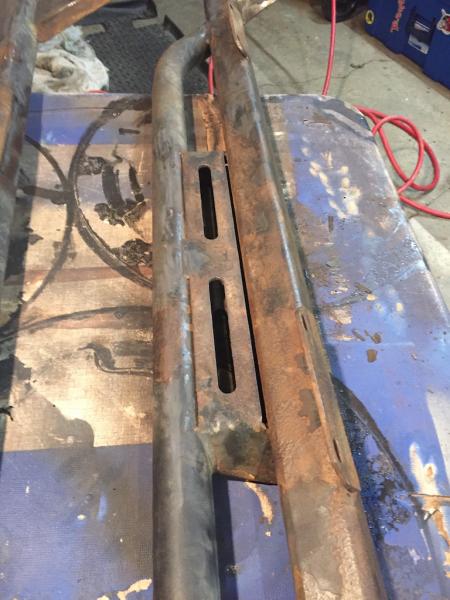
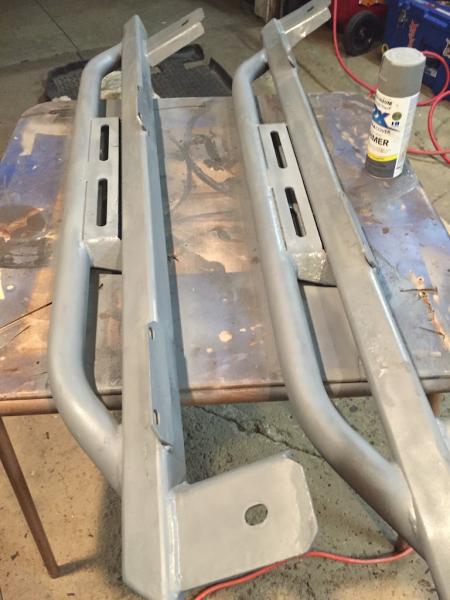
This is what happens when you don’t was the salt-laden snow off your rock sliders. These things were looking worse and worse. Short term fix was to take a wire wheel to them and rattle can the sliders.
Eventually, all of the steel will come off the Jeep, it’ll get blasted and I’ll probably do some kind of bed liner instead of powder coat.
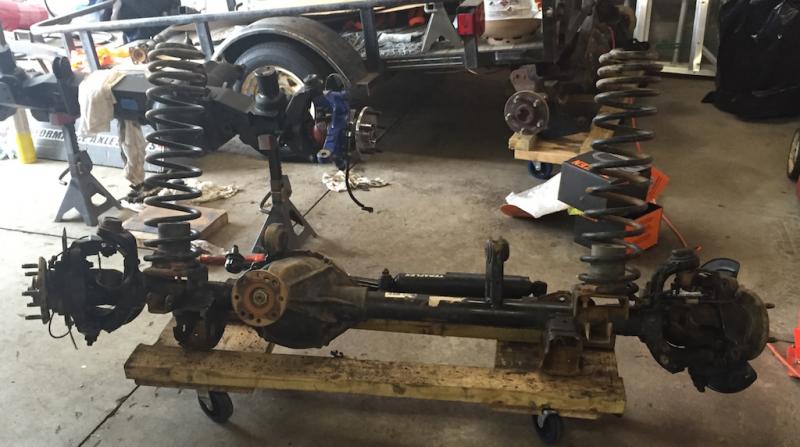
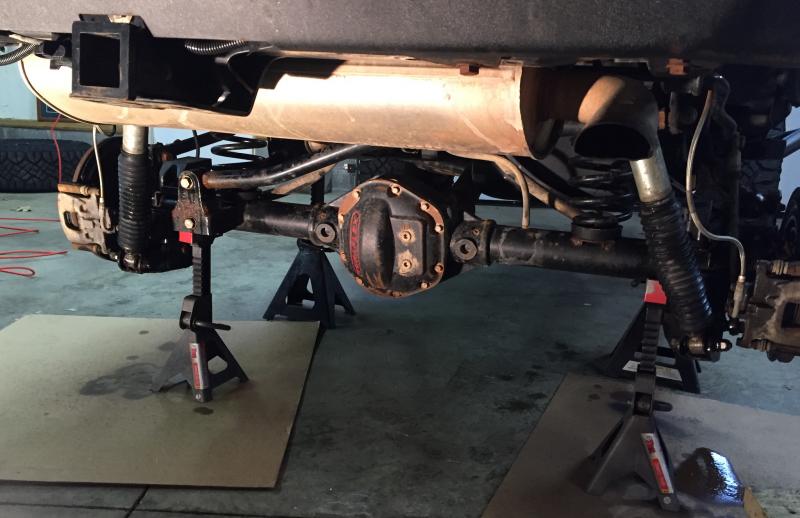
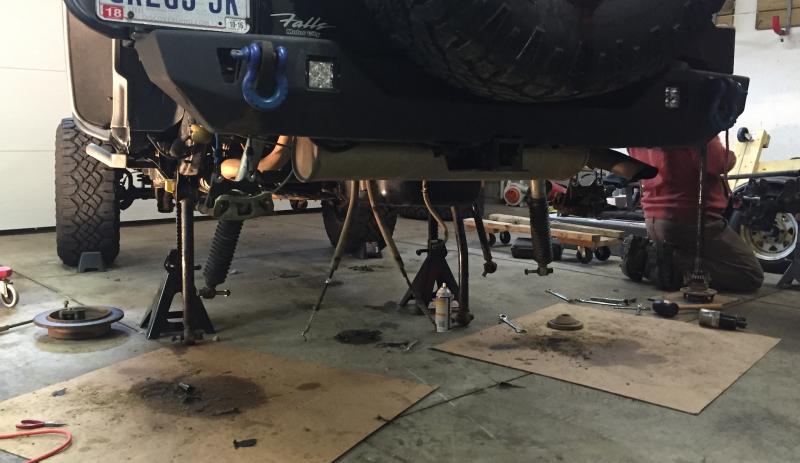
Got the front axle installed this past weekend. It was a little easier than the rear axle, mostly because we didn’t have to beat any brake components off the old housing!
The new front was going to get dressed up a bit before going in. I had new unit bearings, so after inserting the axle shafts, got those bolted on. Getting the RCV shafts in wasn’t too hard. I did use axle shaft guides I had picked up from 4 Wheel Parts to help get them into the diff without damaging the seals or dragging any much left inside the housing into the gears.
These are little nylon washers. Two for each side did the trick. They live inside there just fine and have no affect on the axle itself.
I found out that the unit bearings I got had different length wire on the ABS speed sensor. A whole foot shorter than stock. I thought about removing the ones from the Dana 30, but I really didn’t want to spend the time to take the old unit bearings out just to get the sensors. I ordered new ones from Quadratec. Should be here in a couple days. As much flex as my lift has, I have no doubt I will rip these ones out.
After we got the old housing out, we swapped over the tie rod, springs, spring retainers and sway link lower disconnects. The new axle had the drag link flipped, so no need to reuse that.
Putting the new axle back in was also fairly straight forward. Hooking the wheel speed sensors back up, behind the shock tower, blind, sucks by the way.
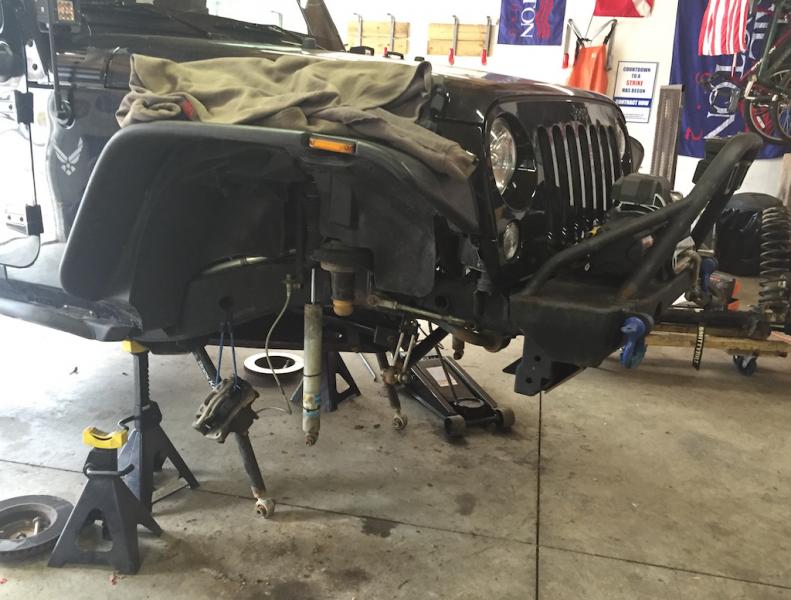
Once we got the wheels back on, it was obvious I needed an alignment. The wheels were toed out pretty drastically. And the steering wheel was off center. We tried soaking everything in Pb Blaster and using some heat, but no go. Took it up to Goodyear the next day. The tech took 3 hours to get the tie rod and drag link loose. Best $85 I ever spent!
I still need to get the driveshaft lengthened – debating on if I should send it back to Adams or have a local place do it for me.
Lastly, I still need to complete wiring up the lockers to the dash switches.
How to install a Rubicon rear axle in 4 minutes or less.
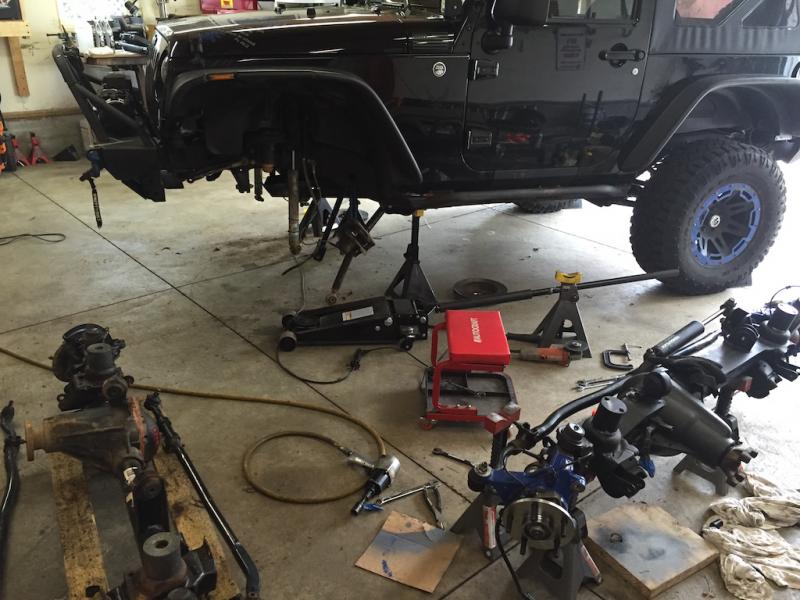
Took all the stuff, including the axle housing to Rob’s place for the axle install. He has a nice 2 1/2 stall garage to work in. I think the kitchen sink is in one of those boxes.
This took a lot longer than I had estimated. I figured around 4 hours, ended up taking 12. Ran into a couple of hiccups.
A high school friend, Peter, had come over to help but had to leave early. Sam also came over and was a huge help.
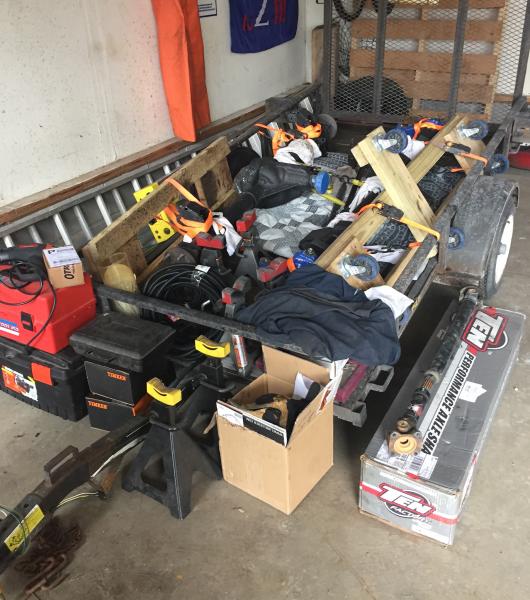
Don’t have a lot of photos, but hope to have a time lapse video in a few days.
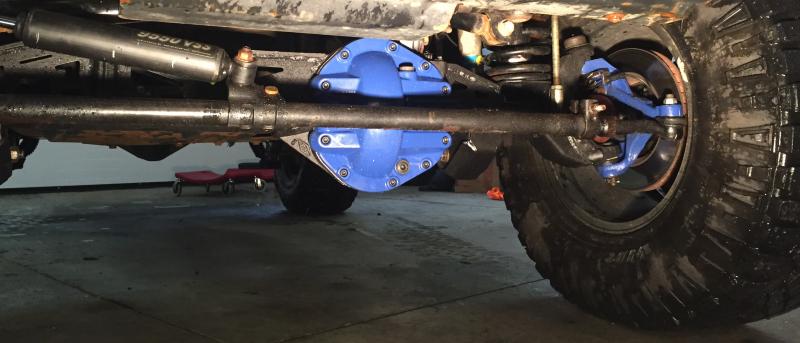
The finished product:
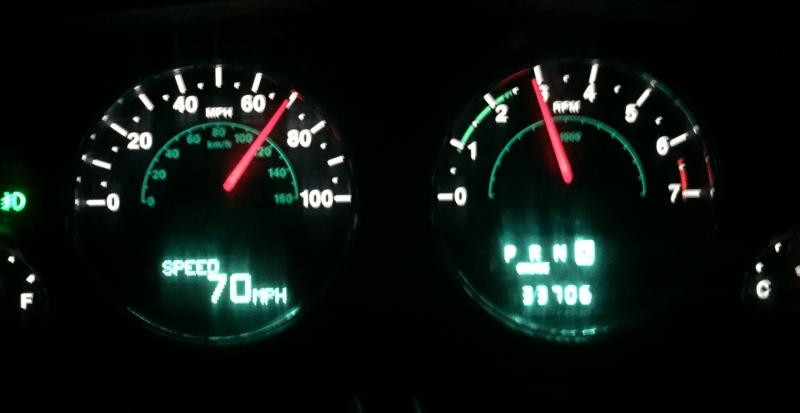
After using a ProCal to set the final drive gear ratio, took it for a test drive I took this on the way home. Tracks with the GPS. Looks about right!
Here were the few quick easy steps we took to swap the axles: