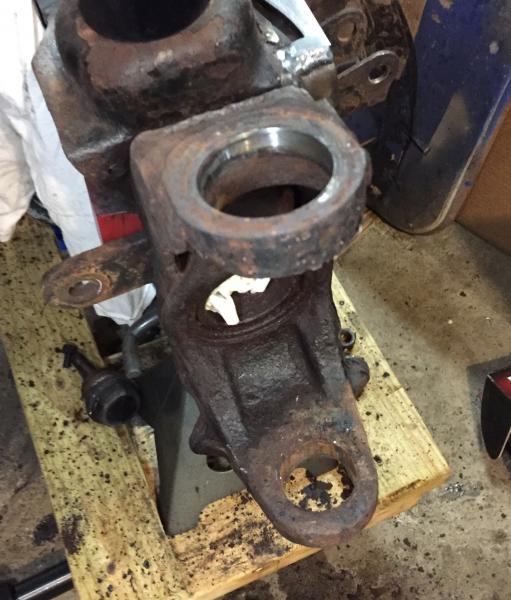
Well, another 90 minutes, and another 1/2 bottle of MAP gas (not really, it just felt that way) and the other side is done!
The top one came out fairly quickly, less than 10 minutes. The bottom, as expected, was MUCH more difficult. I had to heat it up repeatedly. Got out the wire wheel and cleaned all of the rust off of the top of the joint and the adjacent C. Even used a little Pb Blaster after the heat, and then applied more heat. I’m wondering if that didn’t help more than I think.
I’ve helped do ball joints a couple times before, and by far, these were the most difficult. I’m sure there are quite a few factors that went into that.
I also completely removed the rear shafts. Hoping to take these to a drive line shop on Saturday to have them checked out and anything I can make it easier, and less labor, and cheaper, I’m going to do.
Before I install these bad boys, I want to double check that the gears were done right by the shop that did them. I know at least one thing is wonky, the actuator bracket for the rear locker isn’t right. There’s a tab that fits into a slot on the actuator, and it’s not even close. I bought a new bracket, hopefully, I can take care of this myself.
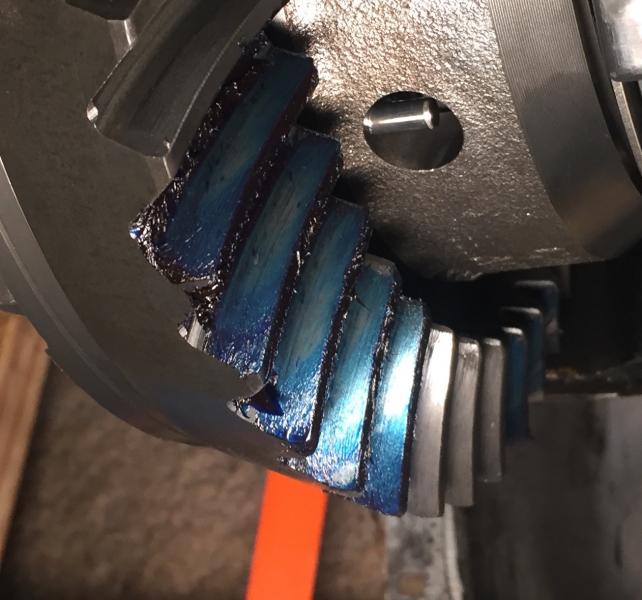
I also bought some Prussian Blue – man that yellow stuff is EXPENSIVE – painted the ring gears. I put a load on the pinions and tried to run a pattern. Being blue, it’s not as clear as the yellow, but here they are. I just don’t know if these are within tolerance, or do these need to go to a drive line shop for new gears and install.
Any R&P experts out there, please feel free to chime in.
With this axle project going on, the last thing I had planned on doing was spending money on something that wasn’t part of it. But sometimes when a deal is too good….
When I bought the Jeep, it only had the standard radio in it. No touch screen, no nav. We’ve had navigation in the last two vehicles my wife has driven, and I’ve wanted to add it to the Jeep. The plan was to pick up an aftermarket radio, like a Kenwood or a Pioneer AVIC (I want Apple CarPlay).
As has happened more and more recently, my plans and their timing changed once again. I found, on Detroit’s Craig’s List, a listing for a Jeep JK Wrangler OEM 730N RHR radio. It’s the one with the TomTom navigation in it. Although I like my wife 430N (Garmin) better, for $400, I had to try and get it. These things sell for twice that.
I arranged with the seller to ship it to me, rather than meet up. As soon as I opened up the box, I knew something was wrong. There is no way this was out of a JK. The mounting tabs were on the top and bottom, not the sides, and it appears the seller had cut the bottom tabs off in order to fit it in his JK. Ugh! I was pissed. I later found out this was likely out of a Challenger SRT. Included in the box was the microphone and the plug for it.
I tried installing it anyway, just to see if it would even work in my Jeep. It mostly did. The mic in my JK wouldn’t work, but the included one did. The USB in the center console does not work. And I was having problems getting my iPhone 6 to pair with it. I eventually found a forum where a member is hosting DVD images of the updated software for the radio (not the NAV). I downloaded it and was able to upgrade the radio, bluetooth problem solved.
I still decided to return it, but the seller was being a jerk. I tried to work with him, but he wasn’t going to budge. I opened up a claim with PayPal. I originally had the seller send me a PayPal invoice, hoping it would help protect me. But the only thing he put on it was the part number and that it was a 730N. Not that it was out of a JK. I still had a decent claim, I think I had a chance of winning it, even though he deleted the CL ad. But I knew I wouldn’t find another radio like this for that price. So I spent New Years Day fabricating some brackets to mount the radio in the JK and to get it to look reasonably OK. It’s not perfect, but it’s close. I did convince the seller to refund the shipping, PayPal fees as well as the $10 I had to spend to get a security code (he didn’t have the original VIN).
I still need to fix the center console USB – that shouldn’t be hard, outside of pulling the center console to get to the port and running a cable from the USB port on the back of the radio.
When a deal seems to good to be true, it probably is. Had I known this was not out of a JK, I would have passed. Knowing what I know now, I’m glad I didn’t.
Spent the day at Andy’s burning some steel! I can’t thank him enough for spending part of his holiday break helping me out.
Authors note: When reading the below, when encountering the word “we”, please substitute the phrase “Andy, while I watched,” in its place.
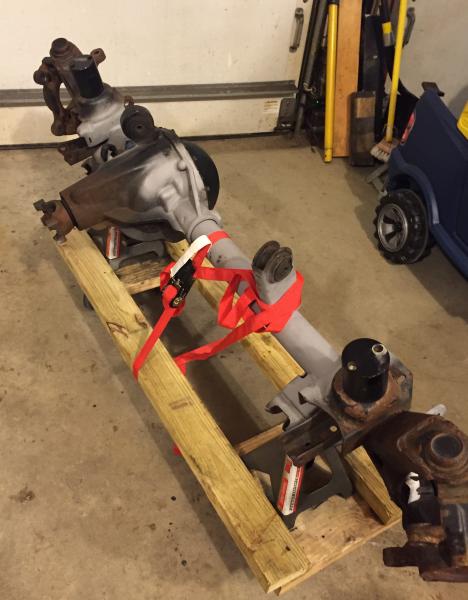
I kept the axles on the carts I built. Made it easier to load them on a trailer.
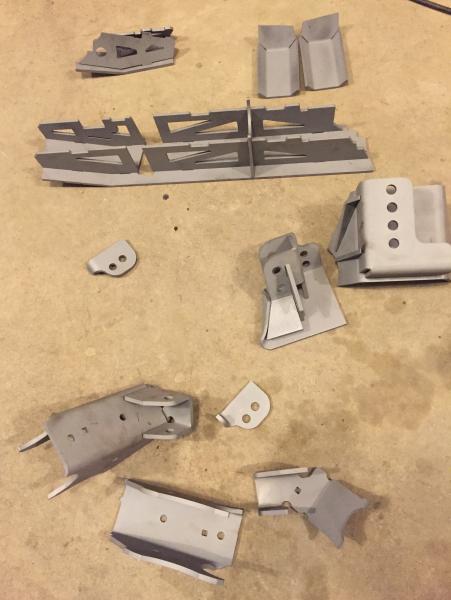
All of the brackets and truss pieces are ready to go. Everything was wiped down with acetone, the edges cleaned with a scotchbrite pad and primed with weldable primer.
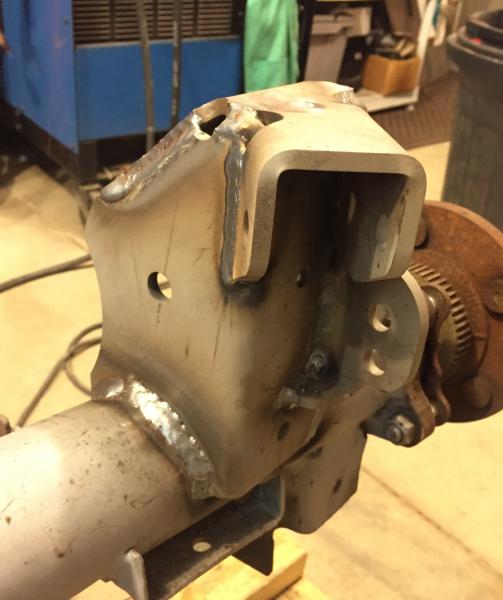
The rear was fairly straight forward, Artec LCA brackets and the Barnes 4WD track bar bracket. We only needed to figure out just where the LCA brackets needed to go. The Artec web site didn’t give any details. Using my Jeep and the stock mounts for reference, clamped up the new bracket and welded it in.
These things are pretty stout. (Note: the axle is inverted in these pictures.)
The Barnes 4WD rear track bar bracket was next. It is just massive. This thing is going nowhere!
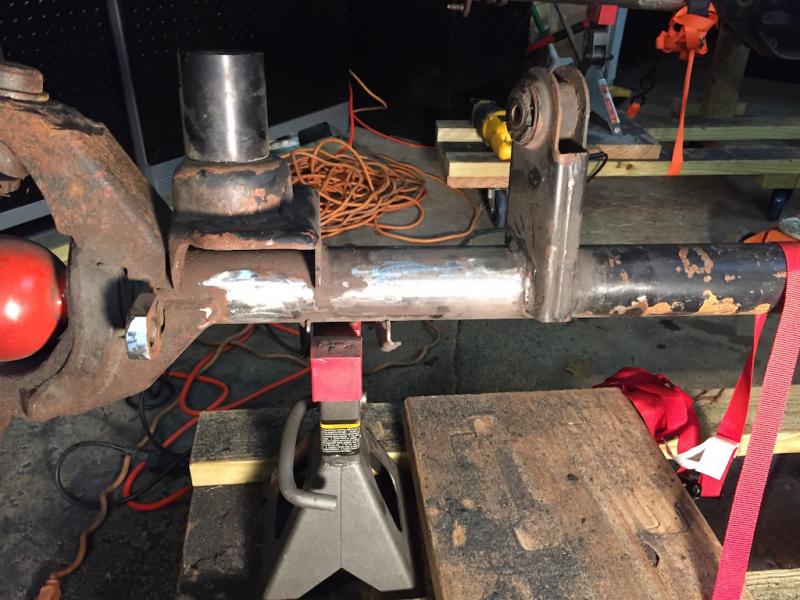
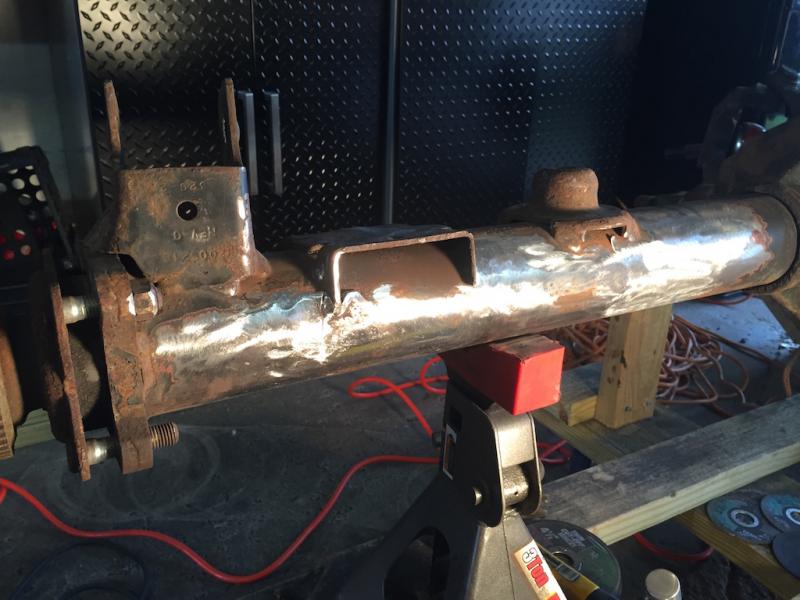
The front was next. First, test fitting the Barnes 4WD truss. This truss is beefier than the Artec, all 3/16″ instead of a mixture of 3/16″ and 1/8″ steel. And, according to Ringer, was much better fitment.
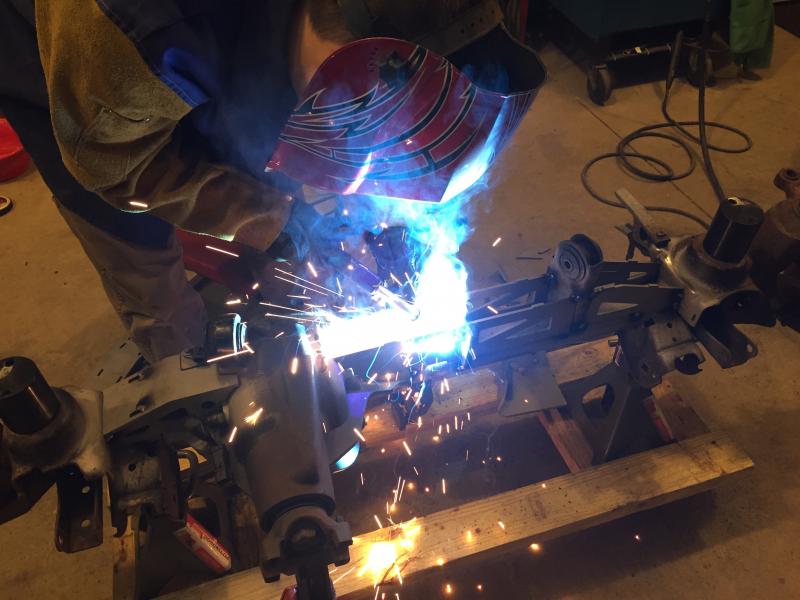
Welding in the truss took a long time. To prevent any warping of the axle tube, we could only weld small beads at a time, moving from one side to the other, front to the back, waiting to allow it to cool in between.
When welding the truss to the cast differential housing, it’s necessary to heat it up first to prevent the weld from cracking, as the two metals heat and cool at different rates, plus have different metallurgical properties.
Next was the Barnes 4WD front track bar bracket, again, beefy. The holes are drilled for 14mm bolts, and my track bar uses 9/16″ bolts, so we opened them up with a 9/16″ reamer.
Next up, Barnes 4WD lower control arm skids! (View from the underside of the axle.)
Lastly, since the previous owner had run coil overs, that required removing part of the spring perch, we had to fabricate a new spot where the spring will index.
All in all, it was a very long day. Over 7 1/2 hours from start to finish.
I cannot express how much gratitude I have for Andy and the Jeep community.
Can’t wait to bounce these off some rocks! (but maybe not too hard.)
Next step is some mild clean up grinding, a wire wheel to clean up some slag (for some reason, the truss was throwing more than the rest), finish cleaning up the rust and getting some paint on them. I still have parts to buy. But my schedule of getting them installed in February or March is still on track.
Getting ready to prep the front LCA skids, front and rear track bar brackets and front truss pieces. This stuff is beefy. Most of this is 1/4″ steel. The Artec rear LCA brackets/skids should be here tomorrow and will get added to the pile. Need to clean them up with a scotchbrite and make sure all the tabs fit into the holes and then paint it all with weldable primer.
Another few cutoff wheels and at least one flap disc and the driver’s side is done. As soon as the Artec brackets get here this week, I’ll know where I need to remove the rest of the paint.